Showing posts with label 12mm. Show all posts

Friday, 23 May 2025

Soviet 12mm WWII Pocket Army


My second WWII Pocket Army is now complete and it pretty much mirrors the German force in content.


9 x Rifle Sections (a company)

1 x 82mm mortar platoon

2 x 45mm A/T guns deployed

2 x Maxim machine guns

1 x observer and radio

2 x SU 122 self propelled gun


Above -  the rifle sections are on 45mm x 20mm bases, with 6 figures per base. this one just has 5 as the flag adds a bit.


This is the basis of a mid-war Soviet force and over time I will increase the infantry element to battalion size, so that it fits with both the Rapid Fire rules and ‘O’ Group rules.


The figures are very nicely sculpted 12mm in hard plastic from Victrix, the two vehicles are SU 122’s (ABOVE), which are 3D prints from Anschluss Wargames and the pair of anti-tank guns are metal from pendraken. 


One of the advantages of this scale and period are that the forces are relatively easy and quick to paint, so these ‘starter’ sized forces can be expanded alongside painting other things.


(ABOVE) As with the German force, I like to have something at the front of the anti-tank gun bases, so that their barrels have something to rest on, protecting them from handling and being dropped! here I have used a ‘fallen tree’ which has been formed from part of a plastic tree frame that Woodland scenics sells.


(BELOW) The mortar teams have positioned themselves behind a wall, which I cut (outside in fresh air because of resin dust) from a section of 10mm resin wall made by the wonderful Battlescale and sold by Pendraken.


Anyway, I now have the beginning of my two Pocket Armies, so time to get some action to the table. I have been researching some actions that involved the SU 122. 


Keep an eye out at the Commanders site (link below) as more content is added for these fellows. I have some Soviet lorries on the way to me, so that I can create a motorised platoon.


https://commanders.simdif.com


Thursday, 3 April 2025

German WWII Pocket Army in 10 / 12mm


Having sold off the 20mm (1/72) WWII stuff last year, I have been buying the bits to put some 10 / 12mm (1/144) forces together.

In the first instance I am going for a German mid war starter force - a new ‘Pocket Army’. 


WWII can pass across the painting table at surprising speed compared to other periods and so it makes for a good quick project to fit in between other bigger projects, that you sometimes need a rest from!


Anyway, kampfgruppe Schmidt is ready for action, comprising as follows;


9 x Infantry bases (6 figures per 45mm base)

1 x Mortar base (with 2 mortar teams and an observer)

2 x HMG bases (1 HMG per base)

1 x OBA observer team (radio operator and observer with field glasses)

2 x PaK 40 bases (75mm anti-tank guns and crew)

1 x HQ base (Horch car and two officers)

3 x StuG III vehicles.

1 x Opel truck


The infantry, mortar and HMG and OBA observer team are Victrix hard plastic figures from their German Infantry pack costing £30, but there are still enough figures left to do quite a few more bases … perhaps even another company of infantry if I get a little creative.


All the vehicles are from Anschluss Wargames. They are resin and the StuG’s cost £3.75 each, the Horch car cost £3.50 and the Opel truck £3.25


The Anti-tank guns are metal from Pendraken Miniatures, costing £3.20 for the pair.


So for around £50 a flexible WWII Pocket Army can hit the table, for say just over £100 plus associated postage for the two small forces.


I have tried to base these so that they can fit into both rural and urban scenarios, but I am not sure that I have achieved that as much as intended. The problem is that if the base goes too dark, you visually ‘lose’ the figures in them. I had to add some light turf (a sort of dusting) to brighten these, but I think that has left them a bit ‘messy’.


Although the Horch car is based, that was really just to create a HQ scene and for this project, for now at least, I am generally not going to base the vehicles. The advantage of basing would be the raising of the vehicle so that they look right next to the based infantry, but I think un-based vehicles sit better on a variety of terrains - we shall see!


The infantry bases each represent a rifle section, so the nine base gives a company of three platoons, a fairly perfect size for my own rules, rather small for ‘O’ Group and also on the small side for Rapid Fire Reloaded scenario books that I have, though the ‘head count’ on the bases might make for a better visual for Rapid Fire games. 


In any case, it is just a starter force and it will be easy to introduce other bases and broaden the versatility.


My intention now is to do a mirror force for the mid-war Soviets. I will look to add a 7th figure to the infantry bases to represent bigger platoons and see what that looks like and probably run one of the platoons with three sections of sub-machine gunners.


After which … ‘Attack on the Rail Station’ and others beckon! 


Progress can then slow down a bit, perhaps a platoon of Hanomag half tracks for the Germans and a truck platoon for the Soviets, before turning to either a British / commonwealth or American force for another ‘Pocket Army’.


I will be adding updates on these Pocket Armies over on my COMMANDERS site at;


https://commanders.simdif.com/dear_diary.html


Saturday, 26 November 2022

The assault on ‘Epic’ Bridge!


A few posts ago (there is a link at foot of this post) I put forward the outline of a multi-period scenario that involved the taking of a bridge over an uncrossable river as the objective.


As part of developing the scenario, today I am running it with a twist. For each unit in the original scenario, I will convert it over to a 3 unit brigade and the artillery unit will become three batteries for allocation to the brigades. Collectively this will put a couple of big divisions onto the table.


Click for a larger image - the battlefield


To get this to fit the 6’ x 3½’ table, Warlord Games Epic Napoleonics are in play with each individual battalion / battery being represented by just two bases. Moving the order-of-battle up to a level of around six brigades per side, allows me to use the Valour and Fortitude rules by Jervis Johnson which I like and they are hosted for free on the Perry Miniatures site.


I will be using Prussian forces (in black plastic) and French forces (in blue plastic). These are being slowly painted, so today, the few already painted infantry bases will indicate the ‘elite’ formation included in the scenario for each side, just as an easy visual marker.


Pre-game, as per the original scenario, I diced for each side to see whether they would gain or lose a unit or just keep the same strength. This adds a variable to what are otherwise mirror forces. Both sides lost a regular infantry unit (or in our case today - a brigade).


Having brigades on the table, highlights the sense of compression / containment to the army that chooses to set up behind the river, which has a smaller deployment area, but has the advantage that the uncrossable river refuses their right flank and being an important consideration because both sides will get a flanking reinforcement at some point.


Another twist that I have added is that the reinforcement must be the cavalry. This just reflects that sense of a mobile action occurring on the flanks of this battlefield and that troops that spill over from adjacent fighting onto our battlefield will be cavalry.


Anyway, 50% losses to one side halts the game and at that point, the winner is the side that can claim to hold both ends of the bridge, anything else is a draw.


A brief overview of the action. 

It was a very enjoyable game, with highlights of importance as follows;


French guns concentrate on their left, with one battery up on the hill, they dominate this part of the battlefield, putting the Prussians behind the river under a lot of hurt.


Above - The French take the bridge, but the Prussians make an immediate and successful counter attack, regaining their end of the bridge.


Above - The Prussian cavalry reinforcement (3 regiments in black plastic to the right) arrives on the battlefield on the French right flank, intending to isolate the French end of the bridge and to support the Prussian counter-attack there. 


Above - This heavily distracted the French, forcing much of their right wing to go into square and a cavalry Vs square contest ensued …. supported by Prussian artillery from the other side of the river.


Above - While the Prussian cavalry kept the French reserve tied down, the fight at the bridge continued with neither side giving ground.


Above - Though a couple of the squares wavered, due as much to artillery fire as the cavalry, the Prussian cavalry were eventually beaten back to the river’s edge with heavy losses (losing two regiments). With their backs to the river, they could see the ominous presence of French Dragoons in force moving towards them. But then, Lady Luck struck, very nearby, a Prussian brigade had found a ford (see scenario tweaks below) and were sending troops across to the far bank to support the cavalry.


But the French dragoons were all over them before the infantry brigade could fully cross the river. Their 1st Regiment went into square on the river bank, but with the dragoons destroying the last of the Prussian cavalry, the French cavalry were able to keep the Prussians in check and something of a stalemate was developing across the field!


Both sides were becoming exhausted and neither side were making any headway at the bridge. Then the moment in time came when the game had to be called because one side had reached 50% loss, it was the Prussians who had lost the most units, but in truth, the French were not far behind, it was that close.


However, the only thing that matters in the scenario is control of the bridge and at the point of calling the game, each side held their own respective ends of the bridge …. so a draw was called and looking at the situation, that felt about right.


Rule Developments:

Mid game, I added a rule to the scenario, which allows for the exploring for a hidden ford to open the game up and create a new dynamic, giving a reason for troops to deploy further along the river bank, away from the bridge.


As a provisional rule I tried this - At the very start of a player’s turn (or first activation depending on your rules), a unit that is touching the river bank can test to see whether they have discovered a fording point. A ford cannot be discovered within 12” to either side of the bridge.


Roll a d6 and on a result of 1 or 2 a ford has been found. Each player can only ever make two such attempts (across any two separate turns) of discovery during a game and once a ford has been located, further tests cannot be made (i.e. there can only ever be one ford …… if there is one to be found at all!).


I thought this worked quite well and if the rule had been introduced at the start of the scenario, there would likely have been every chance of the focus for new action, threat and counter-threat to be created at the other end of the table (the quiet end!).


Conclusion.

The scenario seems to be working well and re-running it with the ‘ford discovery’ rule available from the start would certainly bring the early stages of the game onto a different path as both sides try to take advantage of a potential ford crossing …. or perhaps more importantly preventing the other player from gaining such an advantage at their chosen point!


There is now enough going on here to keep some freshness and  allow for another re-run. The testing to see if forces are gained or lost at the outset, the possibility of finding a ford and the randomness of the cavalry arrival, all contribute to that.


As an aside, I think that overall, the upscaling of the action to the divisional level worked quite well.  


Resource Section.


Previous post on the multi-period scenario used here. LINK

http://battlefieldswarriors.blogspot.com/2022/11/generic-multi-period-scenario-creation.html


A post by fellow blogger (Mark N) of the ‘My Brave Fusiliers!’ blog, who has had a go at the original form of the scenario (thank you). LINK

https://bravefusiliers.blogspot.com/2022/11/multi-period-game-rev-war.html


My sister webspace ‘COMMANDERS’ is being re-configured to showcase various figure and boardgame systems that I am enjoying and gives a flavour of where current ongoing projects are up to. Link.


https://commanders.simdif.com


Wednesday, 26 October 2022

1944 - Henri’s Farm


This is a quick throw down scenario on a 4’ x 3½’ table with 10 / 12mm figures, intending to test my own rules, in particular the indirect fire rules.


We again have a setting around Henri’s Farm, with its stables and workshop (these are my newly acquired Battlescale resin buildings, just rotated off the painting table yesterday) defended by a German platoon (3 rifle sections) and a medium machine gun.


To their rear in the small woods they have an 80mm mortar and to the right, a platoon of 3 panthers have just entered the scene, intending to move to the ploughed fields to dominate the open views their front!


Viewed from the British side.


This was coinciding with a British attack against the farm. Two infantry platoons from C Company have orders to infiltrate the woods and then assault the farm. They have a MMG for immediate support, plus a platoon of 4 Shermans (75mm) moving up the left flank for direct heavy fire support.


Both sides have one off-board artillery fire mission.


Henri’s Farm, stables are on the left. The MMG is in
the workshop on the right.


1100 hours - the assault goes in. The Panther crews can see a couple of the Sherman tanks, they fire and unbelievably both miss (rolling 10’s is an auto miss). The Shermans scurry to put the farm buildings between themselves and the Panthers and start to pump shells into the stables.


1120 hours (3 turns later) - the British infantry have got to the wood edge and their volume of fire, with Sherman support, causes 3 of the 4 German bases in the farm to become pinned.


The Panthers probe forwards threatening the
British infantry in front of the farm.


1128 hours - the German mortar takes out the British MMG.


1140 hours - an event is rolled and the British get an air strike, which they use against the Panthers, without success. They bring down an accurate off - table artillery strike onto the stables, which is very successful, removing one infantry section and pinning another. To add to the defender woes, the Sherman’s relentless fire on the stables removes the remaining pinned German infantry section in that building from play.


A rifle section and MMG are in the workshop and their fire takes another British section, both sides now have their morale levels sitting at just 2.


With the stables clear, 1st infantry platoon race forwards
to enter the farm and the Shermans move around the farm,
trying to engage the Panther tanks.


1146 hours - with the stables clear, the Shermans cautiously skirt the farm to get flanking positions on the Panthers, but the Shermans go momentarily out of command (bad roll) and it gives enough time for the Panthers to respond and hit 2 Shermans. One brews, the other is stunned!


The Shermans are roughly handled by
fire from the Panthers.


Subsequent fire from the Panthers destroy the remaining 2 Shermans and the British morale level plummets below zero, causing remaining units to test for retreat.


Enough bases fail and fall back, that the attack loses its entire momentum and at 1156 hours, the game is called.


The Germans remain in control of Henri’s farm and the British suffer a costly repulse.


Conclusion

Quite a fun and quick game, but I am left feeling that my ‘fix’ with the rules of having units activate by ‘group’ and the targeting of ‘groups’ by indirect fire, remains a little awkward to implement …. back to the drawing board!


Resource Section.


My sister webspace ‘COMMANDERS’ is being re-configured to showcase various figure and boardgame systems that I am enjoying and gives a flavour of where current ongoing projects are up to. Link.


https://commanders.simdif.com


Friday, 10 December 2021

The Attack on Henry’s Hill - 1861

Yikes - flag fixed, thank's Alan


This is a boardgame and figure game mash-up adding activation chits to the Black Powder figure rules for random unit selection, breaking up the normal sequence of play. 


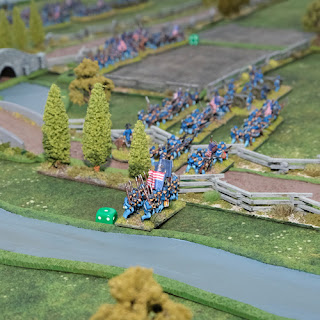
A few evenings ago, we played a boardgame on 1st Bull Run. Just as the Union were putting in their first attack against Confederate forces on and around Henry’s Hill, I took a few photographs and have now translated that moment into a figures game, using Black Powder rules and 12mm Kallistra figures. 


Our short boardgame session did not see us get very far into the game, but we felt that the Union were getting the best of it, as Confederate forces started taking heavy casualties. This Friday, we are gaming at my place, so I am putting this on as a figure game this time, to have another opportunity to examine that action.


This post looks at the scenario building, followed by a brief outline of a test game that I have played in preparation of our game session.


Please use the ‘read more’ tab for the rest of this post.