

Bosworth 1485, is one of the UK’s most significant battles on home soil and together with Hastings 1066, bears witness to moments in time of the most significant and virtually instant dynastic, political and cultural change.
So it is surprising that we don’t know as much about this battle as one might expect and even though there has been notable advances in the past decade of our understanding of the battle location, a working scenario still lacks that certainty that I would like to hang my hat on!
While I'm really just building up two general Wars of the Roses forces, framing it around the Bosworth theme does add an element of grandeur that should keep me sufficiently motivated to see it all through.
An underlying principle for this project is that it should have 28mm armies fighting over a typical UK dining / kitchen table, which will generally be 4’ x 3’ to 6’ x 3½’ for most of us. Because of this, it will also be the first of my armies specifically scratch built to fit into my ‘Pocket Armies’ theme of having a core collection for each army of some 12 - 14 units, from which forces of around 8 - 11 units can be drawn from to set up a game.
Anyway, all of this feeds into a post that gives an update on the figures, a basing decision, a chosen rule set and a sticking point on deployment.
Please use the ‘read more’ tab for the rest of this post.
Sources:
And herein is my main scenario building obstacle. Since 1974, we have had a visitors centre and battlefield walk located at Ambion Hill, courtesy of earlier research commissioned by Leicester County Council. Indeed, the rather splendid yearly re-enactment of the battle takes place there.
There has long been controversy about the site and in the early 90’s, Peter Foss gave a compelling argument for the relocation of the battle, a mile further south west, in his interesting book ‘The Field of Redmore’.
Then around 2010, Glenn Foard and Anne Curry, with a Million Pounds worth of funding, did an extensive examination of the whole area, to better establish the exact location of the battlefield and with some interesting archaeological finds to back them up, they have put the battlefield a further mile beyond the direction / location that Foss had suggested and two miles on from the Ambion Hill battlefield and so my scenario needs to use that latest information.
To get there, I bought two easy read and wargamer friendly books that have their text based around the recent findings by Foard / Curry and importantly for wargamers, maps. If I had bought just one of them, I would have been fine, in ignorance I would simply have taken their deployment suggestions as correct, but having bought the two books, they take differing opinions on how the armies deployed - different enough to matter!

The first book I bought (well a Christmas gift really) was Richard III and the Battle of Bosworth By Mike Ingram (Helion & Company). It is detailed, giving a good wargame background and has the two armies facing each other on a west - east axis with the marsh to the right.

Above - this is a rough schematic of the essential elements that are my immediate concern. The units are positioned rather differently than their line of march might suggest. interestingly Ingham notes that the armies were orientated so that the furrows in the fields were not difficult to foot or obstructive to horse.

The new Osprey Campaign book, revising their original title was recently published in February 2021. I like the readability of the Osprey titles, so grabbed a Kindle copy. But his text has the two armies arrayed for battle on a north - south axis with the marsh between them.

Above - this rough schematic shows how this gives a very different dynamic to the battle. It does position the armies in a way that accords with the line of march. Is it helpful in describing how or why Northumberland stayed out of the fighting? perhaps, but no more or less than the other interpretation does.
Further and not shown in my diagrams, we have the contingents of the Stanley brothers, who are believed to have positioned themselves a distance away, between the flanks of the two main armies and so, their positioning will be quite different depending upon which deployment is chosen, as will the special rules that will need to cover Northumberland’s disengagement from battle or avoidance of making contact with Henry’s force or the Stanleys.
Both authors give good reasoning for their choices. I would like to take into consideration the routes of approach of each force and also, the new archaeology has identified a scatter of lead shot, mainly from artillery, so using the map that plots each of those finds, may help me to jump off the fence one way or the other.
It may well be that I end up with an ‘A’ and ‘B’ pair of scenarios that service both books, though I would still prefer to come to a favoured conclusion.
I felt it rather ironic that despite all of the recent brilliant research and archeological finds, such a big question on deployment remains so debatable, while even the change in the topography still leaves the wargamer with some high ground and a marsh to consider, which in most respects is what the original Ambion Hill location did .... so the new information does not move me on as much as I had hoped.
When looking at scenario / game design, I start off by drawing out a large map, on A3 paper, of the battlefield and then as I read the various accounts, mark the map with appropriate notes, so that it can all feed in to a final portrayal of the battle. This is the stage that I am at now and it is a useful way of seeing how the terrain impacts on manoeuvres as well as the moves and counter-moves of units and positioning of various leaders etc.
Figures:
By contrast, the rest of the project is on a much firmer footing. I like plastics and the period is well served by the Perry 28mm offerings and conveniently supplemented by some Perry metals, these being mainly commanders, but also some foot Men-at-Arms for different poses. Front Rank do a nice artillery piece, which I received as a gift from one of the children (a non-wargamer I have to sadly add, but perhaps the gift is sweeter for that) which I have already painted and based.

I have collected most of the forces needed and just need to keep the momentum up of moving them from the lead / plastic pile, across the painting table. I am also grateful to fellow blogger Phil, who gave me a ‘leg up’, by gifting me some beautifully painted figures.
I don’t particularly want to create a pair of ‘fantasy’ armies, which this period can easily slip into, by including the more ‘unusual’ troops as being common, but I think I can get away with including a Lancastrian block of Perry pike to represent the French ‘long spears’ at Bosworth, plus some handguns / crossbow skirmishers to represent mercenaries, though whether they or significant cavalry should be available in general period scenarios is somewhat dubious, but never-the-less, they are nice components that can be an easily forgiven inclusion to various Wars of the Roses battles, whether historical or fictional, surely I am not alone in thinking that!
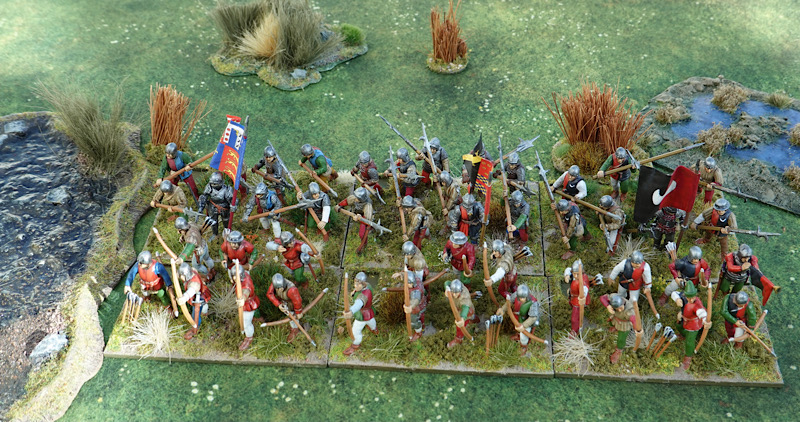 |
| A ‘ward’ of bow and bill 'betwixt' boggy ground |
So that is the figures sorted, well it will be when the not inconsiderable matter of painting happens!
Basing:
In a previous post I discussed a thought that a standard 80mm frontage for units on a single base would be a good fit in getting a 28mm figure into the smaller playing space. Some rules are content to recommend this frontage with 15mm figures, so the basing will work within the rules, it just becomes a question of the aesthetic and that is a personal thing.
Anyway, the alternatives that I have looked at are a unit being formed by; 2 x 50mm, 2 x 60mm, 1 x 80mm, 1 x 100mm, 1 x 120mm. The Impetus style 120mm will probably be the most popular and best looking base for the 28mm, but I have to weigh that up against table size and being able to operate with space on the flanks and so after consideration and doing some mock-ups, I will be sticking with the 80mm, single based unit.
Base depths will vary. 50mm for archers and light troops and 60mm for heavier types such as bill and men-at-arms. The cavalry will have a depth of 80mm, so that they are not ranked in exactly a straight line, giving a sense of motion (and accommodating the lowered lance poses). Artillery are 60mm wide x 80mm deep with one piece and 3 crew to try and get a smaller footprint.
Foot bases have between 7 and 9 figures on them and mounted have 4 horse for heavy cavalry and 3 for their lighter brethren. This is actually helping painting because I only put one unit at a time on painting sticks and this makes the painting and unit production feel much faster or at least less overwhelming than when doing larger units in the later horse and musket period.
I have started adding a 10mm die holder on the back corner of each base to register casualties, which should help keep them universally suited to differing rule sets.
So that is the basing convention decided upon ...... for now!
Rules:
My bookshelves have Hail Caesar, Basic Impetus 2, Ancient and Medieval Wargaming by Neil Thomas, Sword and Spear by Escape Games, both Swordpoint and Milites Mundi from Gripping Beast, Kings of War historical, Never Mind the Billhooks, Mortem Et Glorium and Bloody Barons II from Peter Pig, so there are different ways to go with this.
They are all good solid rules, but in my dabbling, I have been drawn to Never Mind the Billhooks and Sword & Spear. Of the two, I am preferring the Sword & Spear from Great Escape Games, mainly because they seem to nicely create smaller points of interest within each battle (wings / wards / formations), with a tempo that is at the right pace for units to get engaged in the scrum and being effective over a few turns before the accumulation of ‘hits’ start to see things going off the table in quick succession. This slow breakdown in cohesion of the battle does draw you in.

Period scenarios can default into ‘line them up and advance’ type settings, so getting variations of battle results and occurrences within each battle / ward / formation, can give a nice bit of story telling.
I do have my own set that I wrote for the battle a long time ago, but they were based around the casualties made on individual units getting carried by the formation as a whole and causing the formation to degrade over time, until it breaks. I quite like that, but the rules are a little ‘tight’ in how formations are controlled and I think I would like to loosen things up a bit to get a bit more fun and interest into them - so I have started to explore this in tandem with the Sword & Spear games.
Terrain:
Other than the usual thing of hills, woods, streams and rough ground, I have been gaining a few medieval buildings from the Conflix series that are marketed by bachmann, which look quite the part. They do a very good ‘Merchants House’ and the Tavern’ is a perennial, though buildings are not part of the Bosworth battlefield, but will suit other scenarios. They are pricey, but they are resin and pre-painted and as such, a worthwhile buy as ‘forever’ terrain, that can serve a number of periods and landscapes.
Bits & Bobs:
I am still not fully settled on whether to use mat or satin varnish for the completed base. I generally like mat, but is does drastically dampen down armour and colour and this period has a lot of both. The satin really preserves the bright colours of the period and gives the armour a good sheen - but is less pleasing on a horse for example!

I picked up a farm cart, cargo, oxen and crew from Colonel Bill’s, which has already made an appearance in my ‘Stand Firm - Save the Treasury’ scenario (see Resource Section below) and makes a useful ancillary piece of eye candy on the table, as do my Highland cattle (from Warbases).
Conclusion:
So there we are! The project moves onwards and no doubt a few Dungborough / Piggy Longton, fictitious, imaginations type battles will start to appear here on the blog as the forces build ...... until there is enough stuff for a Bosworth day!
Resource Section.
Stand Firm, Save the Treasury scenario. LINK
http://battlefieldswarriors.blogspot.com/2020/11/1471-stand-firm-save-treasury.html
Excellent post Norm, thank you.
ReplyDeleteThanks, it’s on the table now having a Ward Vs Ward run through with sword and Spear and my own tinkerings.
DeleteAn interesting and entertaining lunchtime read there Norm, I like how you are heading with the project.
ReplyDeleteThanks Phil ... for a change there is a plan :-)
DeleteI used to visit the area regularly for work and it is a lovely part of the country. The visitor centre is well worth a visit and the cafe does nice grub!
ReplyDeleteI have visited several times to walk the ‘old’ battlefield and have always enjoyed it.The actual new ‘real’ battlefield covers space owned by several land owners, so access to that is off limits.
DeleteVery interesting sir!
ReplyDeleteThanks Michal
DeleteVery interesting, Norm. Ingram's Bosworth book came up in discussion following the Tuesday Tewkesbury game. Is it surprising that the two revisionist interpretations have the armies arrayed orthogonally? I wonder what evidence is given to arrive at each?
ReplyDeleteYour command stand looks great, by the way.
Thanks Jonathan. I have quickly browsed the books, so am now delving in for a cover to cover read to draw out whatever I can.
DeleteGreat looking Richard III command stand; love the battle and scenario. I used a simplified/modified version of Hail Caesar for this battle some years ago - seemed to work out nicely. I'd like to try it out again someday. Here's a link to my blog post of the game, if you're interested https://wabcorner.blogspot.com/2014/08/hail-richard-triumph-at-bosworth-field.html
ReplyDeleteThanks Dean, will visit your link now, a Hail Caesar game interests me a lot as do the thoughts on simplifications. The Richard III stand is quite a fine fellow, but harsh lighting did not allow good photography in this instance.
DeleteThanks Dean, I enjoyed the read and your ‘Hail Richard’ quick sheet made me smile. Having read your account, I am going to dig out an older text (pre the Foard / Curry discoveries and try to match that text to the new location, to see whether that reveals anything i.e. to disrupt the possibility that the text is set to match the presented landscape.
DeleteThere is soooooo much of interest in this post Norm, thanks for taking the time to set it all down. Very interested in Sword and Spear and the two reference books which I was not aware of.
ReplyDeleteThanks JB, there are a few Sword and Spear videos on YouTube that show play. This project does have its own vibe of intrigue, so I hope progress and a future follow up post will make for an interesting duo of articles.
ReplyDeleteI'm hoping you can follow up and how your armies in terms of the basing, so I can see your method of organizing on the whole. It helps me think through my gaming plans, especially pondering *how many* darn figures to have at hand (I'm a newb and much appreciate the stuff veterans often assume I'd know but don't know).
ReplyDeleteThanks Mike, there will be more ...... though don’t hang your hat on anything I say, I am virtually guaranteed to change my basing 3 times before getting dizzy and falling down :-)
ReplyDeleteI have actually been looking at basing across a wider range of periods and making some decisions, such as 2 x 80mm bases for napoleonics and 3 x 50mm bases for ACW. Within that re-thinking, I am pretty satisfied that single 80mm bases for my Wars of the Roses is what I will be sticking with.
Interesting stuff. So much changed when the actual battle site was uncovered, it's all cutting edge research now. Apparently I had an ancestor at Bosworth. Stanley something. A bit of a cad and a pretty unreliable chap from all accounts.
ReplyDeleteThanks, it fascinates me that such a significant battle has so little detail in the record, even the significant French contingent on the field has scant recognition. The new research has really opened the story, though I would have expected more finds on the battlefield, such as bits of armour and arrowheads, which might have better demonstrated the actual footprint of the battle.
ReplyDeleteWould it be too much to hope for that ‘Dear Uncle Stanley’ redeemed himself by leaving a plan of the battle or excerpts from his diaries amongst his private papers :-)
Lovely Norm it does so encourage me to get WoTR project started 🤔 I have visited the battlefield some years ago just when they were arguing it was or wasn’t in the right place. I am still pondering the basing arrangement. Likely 18 man units on three, but I am not fixed on that yet ?
ReplyDeleteThanks Matt, I have been around the block a couple times on basing. one of the things that I think will influence your final decision is the very dynamic poses of the billmen.
DeletePs looking forward to the bosworth day 👍
DeleteAn interesting post Norm. I'm not sure we'll ever know the deployments of both sides with any certainty, which can be said of so many battles over time. All we can do is make an educated guess with the information available at any given time.
ReplyDeleteRe: the furrows question for example, which is a valid point, it is easier to walk along the furrows rather than across, but it does channel you one way, so it is easier to manouevre across the furrows, but more slowly. Note that this is based upon my experience of modern ploughed fields as a kid on my grandparents farm! Also the pitch and size of the furrows would depend upon the crop grown, so in fact may not have made a lot of difference, especially if the field have been harvested (which I imagine was the case given the date of the battle) as the furrows would have been broken up in the process.
Anyway, digressing somewhat, I look forward to seeing how this project progresses in terms of scenario, rules and figures.
Thanks Steve, there is quite a bit to ponder and deployment differences aside, these are two fine books and an enjoyable read. Mike Ingram makes much of the furrow, something that I had never considered.
ReplyDeleteI find it strange that so epoch-changing a battle such as Bosworth - especially one with so apparently an unlikely and fortuitous an outcome, should have been allowed by the victor (and his dynasty) to sink into obscurity. It is almost as though Henry Tudor and his progeny wished to erase from his and their memory the whole episode.
ReplyDeleteIoin, quite so. The potential for eye witness account and local records is huge and yet here we are!
DeleteIn some ways it disappoints that just 12 years ago, we had the establishment convinced of location and story 'A' and then suddenly that is blown out of the water and location / story 'B' is absolutely embraced and so everyone who has walked the battlefield in the previous 30 years or gamed it were on a false presumption.
I am going to particularly enjoy doing a page-by-page delve into my two books.
Fun post Norm. It’s kinda what historical gaming is all about; getting the figures, finding the rules, and delving into the interesting history. I’m sure it’ll be a rewarding experience. 😀
ReplyDeleteMy knee jerk reaction is that it’d be strange for armies to deploy parallel to the lone of March but perhaps the terrain would be a factor.
Thanks Stew, I suppose by the time I complete the two books, I will not be helped by the fact that both positions with be well argued by their authors :-)
ReplyDeleteSurely. And I’ll be interested in what you think of Sword and Spear. It’s a fun rule set. Though I never could wrap my head around why you can’t have your line charge the enemy line at once but have to go in one unit at a time. It’s rough. 😀
DeleteA very interesting post Norm. It really is amazing how little is known of this battle despte its importance. Personally I have never been to the field itself (wherever that actually was) but I did visit Richard III’s post-battle resting place in the heart of Leicester. The visitor’s centre there makes for a great visit and has some very interesting exhibits.
ReplyDeleteAs for the gaming aspect, I would have personally gone for a smaller scale given the table’s dimensions. However 28mm medievals are so pleasing on the eye and so readily available nowadays that I can understand why the choice fell on them. Will definitely be following this project keenly on your future blog posts!
Thanks Mike, the Perry offering does have a lovely presence on the table and is hard to resist! :-)
ReplyDeleteI am surprised that since the Perry's practically 'own' wars of the Roses in plastic, they haven't gone for a 'battle in the Box' collector / starter set, like they did for ACW. It must be a hugely successful range for them, given the revival of interest in the period.
As always Norm I enjoy reading your posts with my morning coffee. They are clearly well researched but what strikes me most is your enthusiasm for both the hobby and the subject. Your WoR figures are wonderful and I like your Pocket Army and modest table concept a lot. Before I read this post I was out with the dog pondering what has happened to my own enthusiasm for wargaming over recent years as I seem to have completely lost the will to play a game, in stark contrast to yourself Norm. It struck me that I have probably not fully played through a game for something like 4 years at least, yes I have set up a few but never seem to finish, I simply lack enthusiasm and the imagination these days to do what you do. Anyway, I will look forward to seeing how this project develops as the difference between those lines of deployment is fascinating given all of the work that has taken place on the battlefield over recent years.
ReplyDeleteHi Lee, thanks, there will be more on this project as it is likely to be where my 2021 effort goes.
ReplyDeleteAs for motivation, I do think about these things. For myself, over the past couple of years I have been ‘engineering’ my gaming and collecting towards a space that I used to enjoy as a youngster, when the hobby was just fun, whether playing, researching or collecting, it was just a simpler, fun thing to do and of course youth finds excitement in everything, so I am looking for more concise gaming that doesn’t take itself too seriously and if it can look pretty along the way, then all the better.
I also think that a regime of behaviour needs to be grown and nurtured, so that gaming becomes a ‘go to’ habit, take a break from anything for long enough and that feeds in to a new behaviour of avoidance as other things fill that space - worse, it becomes too easy to increase ‘screen time’ as an alternative, I keep fighting that. Even falling out of the habit of reading rules makes a new set look harder to get into, although that could be by grey cells being less sharp :-)
My weak spot (your strength) is painting, a short break on my part can easily lead to a big break. This is the one area that I feel needs a better discipline on my part, but it does feel workmanlike rather than painting for pleasure, though my 28’s have brought a bit more painting joy.
For your gaming, I imagine the whirlwind of changing circumstances over the past 4 years must have had a dampening effect. For the past 2 years, I have kept a diary of my gaming activity (to do an end of year post), so it becomes very noticeable when a gap in the schedule appears and I redouble efforts to get a game to the table.
One thing that I have noticed is that I don’t really want to play long games anymore. I throw some in as a sort of treat game fest now and then, but I am most happy with the 2 - 3 slot. I don’t want it so brief that it becomes superficial, but I think we all have a different sweet spot on that sort of thing.
And yes, that morning space with a coffee is a quality peaceful time to enjoy posting, glad that this blog continues to be a place that you find worth visiting.
Thanks for your reply Norm (as you always do). I don't wish to detract from your post in any way but this has really got me thinking about what's gone wrong for me regarding our hobby. I can certainly still engage with history and the discovery of the body of Richard III several years back was an unforgettable and highly emotionally charged moment for me which in the past would have had me ordering up WoR armies without delay. I must give the matter more thought!
DeleteLee, I think it will come back naturally. There is certainly a constant stream of blog posts these days to inspire and motivate, plus some good YouTube Vlogs.
DeleteSince you are so far down the road with 18mm naps, it would probably be good to look to doing something that is napoleonic but isn’t DBN or C&C as neither of those are firing you up at the moment.
There is a set called Bataille Empire out and of course the new and heavily revised LaSalle is out (though a tad expensive for a try out), but I think both rules probably have video or blog reviews. I only mention these two sets because they do the smaller table / faster play thing, which I know will tick your boxes and it is something different. As always, I like spending other peoples money :-)
There are probably some free sets around, just for tinkering and ‘getting into the zone’ :-)
great Post Norm,
ReplyDeleteI fought it four years ago using impetus from memory my army was 5 units of Longbow A and B (8 minis per base, 40 figs) three bases skirmisher archers (4-6 figs each) 6 units of MAA Bill mixed (10-12 figs per base) in double units with depth (two flank units with front MAA back Bill), two gun models and 1 mounted MAA (6 figs) and 1 mounted crossbow (4 figs). I had a victory for the Yorkists and it was played on a 6x4 table, based on the old battlefield.
I should see I can put on a game for the anniversary this year.
cheers
Matt
Thanks Matt, I have Basic Impetvs 2, so will have a look at that compared to their army list, it sounds a very do-able sized army. The Society of Ancients are doing Bosworth this year for their Battle Day, so there could be a good bit of interest in Bosworth projects this year.
ReplyDeleteNorm you have my full attention with this project! Cant wait to see more, sir. Also - I just picked up your Hastings rules / boardgame and am keen to give it a go. I'm really broadening my horizons this year playing eras and periods I know little about!
ReplyDeleteThanks Steve, more to follow and thanks for supporting the Hastings game. Your plate 2021 plate is full :-)
ReplyDeleteAn outstanding post. While I have never had a interest in the war of Roses you have me calling my local library to see if they can get me the books you recommend. Many thanks!
ReplyDeleteThanks Mark, I have just closed the Osprey book, which I enjoyed and will start on Ingram’s book tomorrow. Enjoy your read.
DeleteLove the broad perspective covering history, the latest ideas on the location of Bosworth, issues of unit size and basing, background books, plus great pictures of the figures that you've painted and all the scenery creating diaramas. Always, always a good read.
ReplyDeleteThanks Mike, this has my fullest attention at the moment, so I hope it goes somewhere.
ReplyDeleteHello Norm
ReplyDeleteNote of interest that the Battle Of Bosworth is this year's Society Of Ancients Battle Day battle (it was going to be 2020 but was postponed to this year). To be played late March. I am like you in that I was thinking of playing it in March 2020, did some research and found the most recent stuff, and conflicting deployment! I moved onto to other projects but still keen on the battle so following this with interest. Of the rules you list I think Sword and Spear is a good choice, even though I haven't played with them they seem well suited.
Good luck on the project! Oh, and the SOA page for Bosworth Battle Day with some useful info is here:
http://soa.org.uk/joomla/battle-day
Hi Shaun, thanks, looking at the way that things are here (UK) with Covid, I think the SoA will be kicking their Bosworth day a little further into the future.
ReplyDeleteI am doing little mini mock ups with the Sword and Spear rules and getting a feel for their subtle nuances. I will make a start on my Henry command stand today, though still a long road to travel for the OOB that i want.
Really absorbing post Norm...in some ways, I doubt it will ever be possible to say exactly where a number of earlier battles took place. I like your proposal to just use both versions and play the game twice! The figures are great and I like the unit sizes too...less is more in my book...I am not a fan of 36 or 48 man units in 28mm!
ReplyDeleteThanks Keith, I’m finding that my photography is not giving the figures the same presence that I personally get when playing and like your good self, the smaller units work fine for me.
ReplyDeleteIt is easy to get into a state of ‘I need to know exactly how this battle happened’, but sometimes it is better just to step back, chill and have a fun game ....... of a game! :-)
Interesting post and a good read, Bosworth was our second demonstration game in 1985 using revised Bill Lamming rules - individual figures! Lots of them . It’s interesting to note some of the new evidence since then, obviously the new location being pretty profound, but artillery etc. I would have hoped the archaeological finds may give a hint as to the deployment of the armies?
ReplyDeleteI know for the activities of the Stanley’s and Northumberland we devised a point system based on attrition to see if and when they committed to battle, The Stanley’s committed to Henry as soon as there was a slight edge to the Lancastrians but were unlikely to commit to Richard unless victory was almost a certainty likewise unless Northumberland’s troops were attacked ( unlikely) it was unlikely he would commit to Richard unless the battle had swung firmly in his favour ( I may still have the notes for this battle!) 1986 we did Tewkesbury and 1987 Stoke Field all fascinating in their own right
Hi Graham, of course 1985 was the big one (500th anniversary) so your ‘big game’ must have been especially interesting. There was much more certainty about the ‘wrong’ battlefield :-) and a lot of fun doing special rules re treachery etc.
ReplyDeleteInterestingly, i have just read the new Osprey book and have started on Mike Ingram’s book and as early as in the introduction, he is saying that it is a misconception that the Stanley’s were ‘fence sitters’, he has them both as pro-active and signed up participants of the rebellion. I will see how gets to that, but it will likely play into the scenario rules and it may be a fun thing to explore whether the Northumberland situation was directly influenced by Lord Stanley’s actions and position on the battlefield - I will read on with interest ...... also this is a good excuse to the Men of Iron boardgame out again :-)
Cool post Norm. I shall look forward to see this project move forward.
ReplyDeleteThanks Ray, enjoyed your latest terrain piece.
ReplyDeleteEnjoyed reading this post immensely! Thanks for sharing.
ReplyDeleteThanks John, the post seems to have struck a chord with quite a few readers, more soon I hope.
ReplyDeleteReally interesting post,lovely command stand, the debate does seem standard for wars of the Roses Battlefields. I used to walk my dog on the more recent position of the battle of Barnet, although there had been no finds, which is strange asthe battle started with an artillery exchange and now the view is shifting back to where the 19th century memorial and where it used to be! I think the university of Durham are researching/ digging it so maybe we will know more or judging by Bosworth maybe not!
ReplyDeleteBest Iain
Thanks Iain, between ‘lots’ of arrow heads and artillery shotte, some of which contained iron, I would have thought that ‘war debris’ would have been all too readily laying around for us to discover ..... but apparently not!
ReplyDeleteI hope more is discovered, as the discussions and publications that fall out of discovery does fuel interest, even to the wider public.