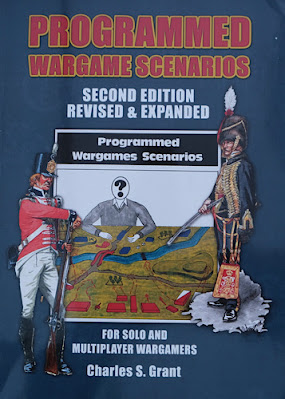
Last year, I bought the new edition (revised and expanded) of Charles S. Grant’s Programmed Wargame Scenarios - for solo and multiplayer wargamers.
This essentially has a number of multi-period scenarios and two campaigns that are described in terms of ‘Red and Blue’ armies engaging each other. They are set out in such a way that a solo player can use a ‘programmed’ method of deployment and reactions to manage one or both of the armies and of course the scenario can also be played traditionally between two players, just using the book as a scenario generator.
Today I am trying out the 1st scenario - Hill Line Defence.
Blue army is slightly weaker ( at 1250 points - in WRG terms I think) and holding the ridge. Red army is slightly stronger (1500 points) and holding the lower ground with a stated mission of assaulting and capturing the high ground.
The scenario can fit any period, so I have chosen Wars of the Roses armies, as the troops are getting restless and need an outing :-). The situation has the look of a Hastings 1066 type scenario and this could be somewhat replicated by the attacker with a Norman force choosing the army type that has 20% Shock Troops, which can be heavy cavalry.
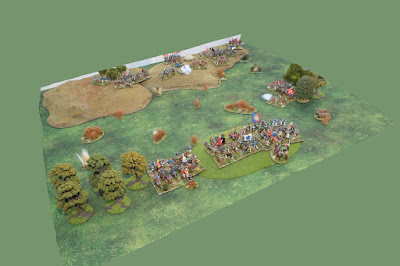
The battlefield is built up by randomly selecting 3 sectors (think of three 4’ x 2’ terrain panels) from the 9 potential sectors of terrain to choose from. These 3 panels will sit side by side to give the player a 6’ x 4’ table.
I am compressing this onto a 4’ x 3’ table and that seems to work fine with the forces chosen (28mm on 80mm bases).
Anyway, I am now reading through the orders / deployment sections of the scenario. It is presented in a sort of way that means things like, if you are the Blue player, read this now, otherwise skip this and go straight to the Red deployment section etc.
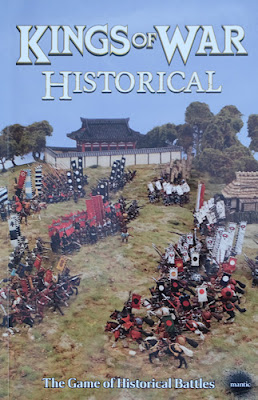
Please use the ‘read more’ tab to get the rest of this post, which will outline how it all generally works and how my game played out, using the Kings of War Historical rules, by Mantic Games, for a change.
In this game, Blue army, the defender of the ridge, will be guided by the scenario programmed system and I shall play Red, the attacking army and of course …. ‘This army shalt smiteth the foe and taketh the ridge from the men of Y’rk’.
As the Red player, I roll to see whether I can deploy after enjoying a reconnaissance of the enemy deployment - I fail, so I deploy first as I see fit, knowing only that the enemy is in front of me on the ridge.
Time to design the battlefield. There are 2 map pages in the scenario, one for Red and one for Blue. Since I have failed my reconnaissance I can only look at the map page for Red. I roll the 3 dice to select 3 sections of map, giving a centre and two flanks. It shows where my troops can set up and shows the ridge beyond. My map may or may not have all the actual terrain detail properly recorded on it (fog of war). I set the table, but as stated, compress the terrain to fit a 4’ x 3’ table.
I am allowed to choose one of 7 army type groups from a list for this scenario, which is described in terms of unit type and the percentage of points that can be spent on that type. My army has 10% scouts (light cavalry), 10% skirmishers, 60% line (bill and bow), 15% shock (dismounted Men-at-Arms) and 5% support (artillery), for a total of 16 units.
Not knowing what WRG points look like, I just used the point system from Kings of war Historical and got pretty close to the scenarios suggested (1250 points Vs 1500 points), while breaking down the force into the various percentages of each category.
I put my main strength in the centre, including the two dismounted Men-at-Arms units, with a mix of units to the flanks that included skirmishers, light cavalry or artillery, with each wing also supported by one bill and bow unit.
With these rules, the units in their ‘at start’ positions put them just within bow range of each other (with my commonly used Sword & Shield rules, units starting in these same positions would be outside of bow range and the attacker would need to close before using their arrows).
My orders are given. The archers will open the battle and once the enemy are sufficiently weakened, the centre (only) will advance to contact to take the high ground ahead of them. Our flanks will pin the enemy flanks with their bow, but only advance upon the enemy when the local commanders deem that a local victory to that flank is likely.
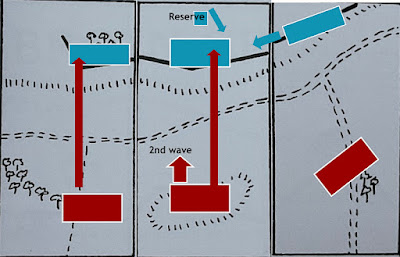
Having set my Red army up, I am now allowed to select the Blue army, which is described in similar fashion to the Red army and contains just 12 units. I look at the map for the Blue army and it shows (black line) how they should deploy within the constraints of the hill.
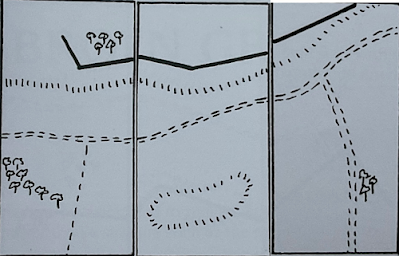 |
| The map for the Blue player |
Next, the deployment of Blue’s light troops is randomly selected - the result is that they should deploy equally across Blue’s front.
The rest of Blue army is now deployed. A die roll dictates that they should deploy with 30% of their strength to the centre and 35% of strength to each flank ( this is interesting, if free to choose, I would have loaded my centre at the expense of the flanks and helped the flanks with skirmishers - so this is forcing my hand to play a slightly different solo game than I otherwise would have done - good!).
Now, 15% of the centre must be deployed as a reserve. This amounts to the one unit of Men-at-Arms, being pulled back to the centre rear, leaving just 2 archers and 1 artillery piece in the front line of the centre …. Oh Dear! thinks the lonely programmed Blue commander as he surveys the large body of enemy deployed below him.
Since I have already deployed and written my own orders for the Red army, I am now able to randomly select Blue orders from a list using a D6.
The result is that ‘Blue will take the offensive wherever the opportunity offers’ ….. that is another surprise for this solo player! I fully expected them to just stay on that hill and hunker down. I’m glad I bolstered my flanks with some bill and bow.
I note that there are also some randomised response options for Blue army depending on how the battle progresses, for example if they suffer undue pressure on one of their flanks, they roll on the response section to that situation and that score will tell them how to react, so we will have to see what transpires during play.
There are just a couple of other things to cover. I am going to dice to give the generals a character.
Red General (me) - BOLD, this is pretty good, allowing the leader to act spontaneously to the situation.
Blue General - also BOLD …... drat!
Each wing also has sub-commanders and they have also been tested for attributes. Both of Blue’s wings are Cautious, while my own wings are ‘Deliberate’. The downside here is that they will not act on their own initiative, yet, I have ordered them to attack when they consider to the situation before them ripe for victory, so we will just have to see how that goes.
Secondly, at the start of a player’s movement phase, the active player draws a card from an ordinary deck of cards. These are chance cards and a chart explains for good or for bad what happens. Only 25% of cards drawn will generate a chance and their impact is generally gentle and local, but enough to give added narrative.
So that is that. The battle can now proceed under the normal rules that the player has chosen to use.
The scenario sets the objective mission for each side (i.e. capture / defend the high ground), but not the actual victory conditions - so I will allow Red army to instantly win if they can have four units on the high ground AND have inflicted 50% losses on blue army (Blue must lose more than 618 points worth of units for this to happen), Blue army will instantly win if they simply inflict 50% losses on Red army (Red must lose more than 775 points worth of units for this to happen).
This means that Blue can win while simply sitting on the ridge, while Red are obliged to fight their way onto the high ground. Only play will show whether these are balanced conditions.
Fight, Fight, Fight!
The following will just give a brief overview of the action and I will refer to any of those Blue ‘responses’ as and when (or if) they occur.
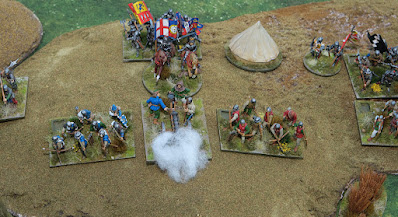 |
| Blue’s centre is really quite weak, though they have a reserve of M-A-A at the back. |
Play opens with Blue (defenders) shooting their arrows and cannon first. This is my first go with Kings of War and I am immediately shocked at how brutal and decisive the combat system is. I re-check the rules and I am playing correctly. My melee troops need to start moving. From the centre, the two Men-at-Arms units and a bill unit start their advance.
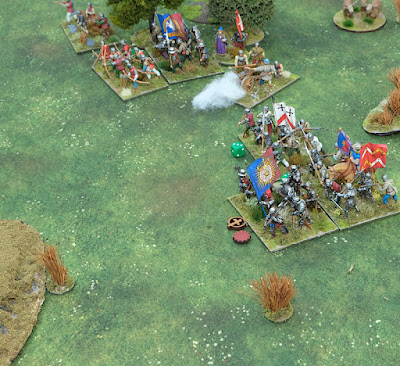 |
| My Men-at-Arms take heavy losses and become disordered and are wavering! |
Blue is getting the better of the arrow storm! One of my Men-at-Arms units stall on the valley floor due to the intensity of incoming arrows and a particularly successful cannonade. Red have barely got their attack going and have already lost 310 points worth of units (remember, they will lose the game if 775 points are lost).
I send orders to my left wing to start advancing, but their commander is ‘Deliberate’ in nature and so there is a one turn delay in those orders being acted upon.
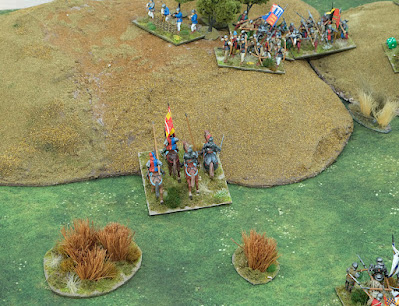 |
| Units start to reach the ridge, triggering a programmed response from Blue. |
As my line push themselves forwards to the base of the ridge in the centre and on the left, the threat triggers a response from Blue. The dice are rolled, a list checked and the result is that Blue will commit the reserve to the centre.
The programmed system is not an AI, the solo player must still manage the usual aspects of gaming the ‘programmed’ force, so I decide that in the current situation, the Blue commander would seek additional support from his flanks, so I allow him to send out orders to his left flank, requesting the support of a unit of billmen, but the commander there is ‘cautious’ in nature and it will take two friendly turns for that order to be acted upon.
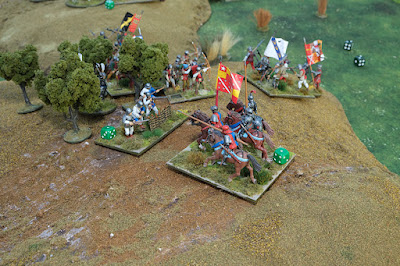 |
| I attack the enemy right flank with cavalry and billmen. |
My light cavalry on the left charge uphill at the gunners, but recoil, my losses in the centre mount, with one of the Men-at-Arms units adding themselves to the local rout!
Red army draws a chance card that gives a cavalry unit a bit of good terrain in front of it. This will negate the penalty the my cavalry would have suffered this turn being on the hill. Things are slightly starting to pull in my favour as the close assaults on the hill start to see Blue forces degrade and run, but I am reminded that things are still really tight as my commander on the left is killed.
 |
| The melee scrap develops, why won’t my right help out! |
Then the pivotal moment arrives, Red have inflicted 50% casualties on Blue, but they only have three units on the hill and they need four. Play swings back to Blue, who must counter-attack to get the advantage back, but they don’t do enough and Red gets another unit on the ridge, making four and is able to call an immediate win.
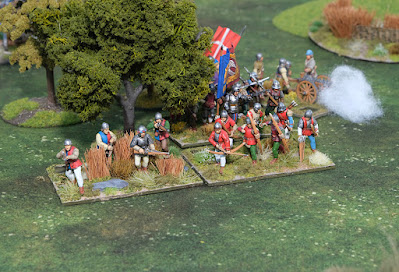
 |
| My right remained quiet as the ridge ahead looked too dangerous. |
That was close and for much of the game, I couldn’t really see Red winning this one. By the end, Blue had racked up 545 points worth of losses against Red and Red had a couple of units teetering on routing, so with a bit more luck, Blue might have been able to hold on.
Conclusion.
That was a very enjoyable game. The Kings of War plays faster though does not have some of the subtle nuance that I get from Sword & Spear, but it also felt less mathematical or technical and I think more enjoyable because of that. I will certainly re-read the rules and then have another game with them, there is something quite compelling about them.
Wars of the Roses armies have a lot of Longbow and these are very effective in KoWH, leading to a high unit loss rate in what felt like a short period of time. Using these rules for your evening game will definitely get you to a gaming conclusion in that single session.
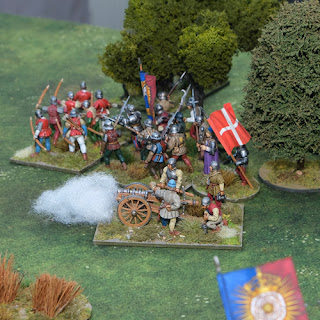
 |
| Blue looking down at my right flank, neither side wanting to get their hands dirty here! |
Grant’s programmed scenario bought a lot of narrative to the game. I particularly liked the way leader abilities can put delays on new orders being put into action, reminiscent of old school games and with Historical Kings of War lacking an obvious command range type command and control system, the two books complemented each other nicely in that regard.
I bought my copy of Programmed Wargaming Scenarios from Caliver Books (UK). If you are stuck for that good wargamer Christmas gift to yourself, this is worth your consideration.
There should be some good YouTube reviews by now.
Resource Section.
My sister webspace ‘COMMANDERS’ is being re-configured to showcase various figure and boardgame systems that I am enjoying and gives a flavour of where current ongoing projects are up to. Link.

A very interesting report Norm, I enjoyed it a great deal, good to know that you can compress it to a smaller table, I have a 6x4 but prefer my 4x3 a lot of the time.
ReplyDeleteThanks Donnie, I get the impression that the book is very forgiving and sees itself as offering a basic structure or guide that the player can broadly follow, but deviate from as occasion demands.
ReplyDeleteCheers for that Norm a most enjoyable read.
ReplyDeleteWillz.
Thanks Bill, it was a pleasant way to game through a Saturday afternoon.
ReplyDeleteAnother interesting foray into Grants book, Norm, and it all seemed to work very well....a close run thing but you managed to beat the AI, well done! Figures and terrain look great as always
ReplyDeleteThanks Keith, I have brought this book down from the shelf several times, but never quite jumped in. Having done this one, I am quite keen to get some more done.
ReplyDeleteThat worked very well, I shall have to dig my copy out the next time I plan to fly solo. You can guarantee that a game with Kings of War will not drag on and on🙂
ReplyDeleteHi Phil, comparing the KoW with Sword & Shield is like day and night, but I can’t call one better than the other, KoW gave a great game … a sort of movie game, though I think I might like to tinker with some of the stats sheets and make it a bit more WotR specific.
ReplyDeleteAn excellent game there Norm and great overview of the book. I hadn't realised it had been updated and re-published, which is great to see. This has inspired me to dig out my copy and give it a proper read through with the intention of running at least one scenario this side of Xmas.
ReplyDeleteKoWH I've never played but I recently pre-ordered a copy of Hail Caesar II, to use for some medieval games at some point. I've realised that a commonality of the rulesets I play these days is very important, making it easy to flit from one period to another. Also of course they need to be solo friendly and have some in built C&C friction, which I enjoy.
Hi Steve, I think HC 2 will be a big success, especially as it will expand into Wars of the Roses, which seem to in a lot of collections and as you say, commonality over such a time range is very attractive.
ReplyDeleteI have been wanting to use the programmed scenarios for a while, so it was good to get it the the table.
I think the Warlord boys needed to update the rules anyway, but also to expand the time frame, given the recent publication of the 'Never Mind The Billhooks' book, which has expanded the timeframe of the original free rules.
Deletewars of the Roses was never properly defined by their sets as it fell right between the Hail Caesar and Pike & Shotte sets and covered by neither.
DeleteLooking good, Norm!
ReplyDeleteFor this action, did you reduce your BMUs from three stands per to only one? If so, was this due to space constraints or have your units always been one stand each and my memory is fading?
I have the original Grant Programmed Wargames Scenarios book but have not pulled it off the shelf in a very long time. When I saw that it was revised and republished, i was curious what may have changed. Can you provide a recap of the differences between the two editions?
A terrific, programmed approach for solo play but I doubt you need such inspiration or motivation.
Hi Jonathan, 1 stand is 1 unit. The frontage is 80mm i.e. the base frontage that the likes of Impetvs would employ for 15mm, but I have 28’s instead. The idea was that single unit basing was fine and that as the collection grows, I could switch some games to 2 bases per unit if necessary - that would in particular make the cavalry look better.
DeleteThe new edition of the book is described as ‘revised and expanded’ though I can’t seem to find the text that explains exactly what that means.
It does look like a new scenario has been added (19) called Fog of War, which presents a table battlefield / terrain generator, so that the battlefield is randomly generated from drawn tiles. The game then starts with each sides orders of battle randomly arriving and eventually a battle of some description will develop.
There are two campaign ideas, which may be new, an expeditionary force and a reconnaissance in strength game.
Norm, thanks for the book and figure details.
DeleteNorm thanks for the information on the Programmed Scenarios book. That sounds very interesting. Playing through one of the scenarios gives a great review!
ReplyDeleteHi Ben, I enjoyed the first game enough to want to try some more.
ReplyDeleteHello Norm,
ReplyDeleteIt does sound like both the programmed scenario and the rules (KoW Historical) delivered on having a good time. I have the old book and enjoyed the one scenairo I playeds but too many projects have seen me not go back to it. I played KoW once with a friend - I found them simple but tactical challenging, so a good thing. But again, too many projects to get back to them also! So I have at least an inkling of the fun you had :-)
Hi Shaun, I know what you mean about having so many things that could do with visiting / revisiting, that so much gets squeezed out. If nothing else, it was a bit of quality gaming time for a Saturday afternoon. I am quite keen to look at the two campaign modules to see whether I can set myself up a slow burn project for 2023.
ReplyDeleteNorm, excellent report. I have all of Charles Grants scenario books. Scenarios for all ages offers 52 different scenarios and whilst not ‘ programmed’ I take a lot of the Featherstone and Grant ideas ( prepare 6 different deployments, a number of different orders for each deployment etc) to create some grate solo games and of course I have the first edition of this book and I think I’ve played most of the scenarios, you certainly can’t go wrong with having it on the shelf. As to the rules I found them a little too brutal for my liking but I’m sure you will ‘ tweak ‘ them if necessary.
ReplyDeleteThanks Graham, ‘Scenarios for all ages’ sounds exactly the sort of book that should see a re-release. I have just checked Amazon to see if there is a Kindle version, but not as yet. It is amazing that we were so well served by books in yesteryear.
ReplyDeleteYes, I think I would like to work with the rules to bring them a little more specific will WotR army lists and capabilities - but they look solid enough to stand that sort of tinkering.
Norm, I get most of my ‘old school ‘ books from John Curry Wargames project and you’re right it’s easy to forget how well served we were with quality product
DeleteThanks Norm, a lovely report and quite inspirational. I think I bought the original book when it came out ( probably from my student grant! ) and sadly never really used it, but you have given me pause for thought - of course we should be able to scale down the terrains for smaller tables! I'd better dig out my copy..
ReplyDeleteThanks David, Worth digging out, there is a good read there, if nothing else.
ReplyDeleteNever owned this book. Going to remedy that straight away.
ReplyDeleteHi JB, there is much to like.
ReplyDeleteNicely done Norm, I have the original scenario book but rarely get to play anything from it, of course I should. Kings of war are very elegant in my view and a perfect set of core rules which you can then adapt as much or as little as you like. Particularly good for ancient and dark ages Where combat is brutal hand to hand between blocks of men.
ReplyDeleteThanks Matt, yes there are a couple of points where you can tweak without really upsetting anything else mechanics wise, they are very solid.
ReplyDeleteGreat report norm- the old, and now revised, 'Programmed Scenarios' booklets are my most referenced books. I enjoyed reading your BATREP- and have a copy of KoW on my shelf. You've persuaded me to give them a try.
ReplyDeleteThanks John, Yes, I think the book is a gem, I will be taking a close look at one of the campaigns next year. I would be interested in your thoughts on play with KoW. The rules are short, so a huge investment in time is not needed for the purposes of trial.
ReplyDeleteHow different is this version from the original please?
ReplyDeleteHI, The new edition of the book is described as ‘revised and expanded’ though I can’t seem to find the text that explains exactly what that means.
ReplyDeleteIt does look like a new scenario has been added (19) called Fog of War, which presents a table battlefield / terrain generator, so that the battlefield is randomly generated from drawn tiles. The game then starts with each sides orders of battle randomly arriving and eventually a battle of some description will develop. It looks quite interesting as a generic multiple use throw down scenario.
There are two campaign ideas, which may be new, an expeditionary force and a reconnaissance in strength game. I don’t have the original, so cannot compare. It looks to be one of the Caliver Books publications that they do, so there may be some more info on their web page.
EDIT - Kev, Caliver Website doesn’t give much, but I found this short video at Wargames illustrated which may help you, as it does a page by page flip …. Though oddly does not show the two campaign chapters!
Deletehttps://www.wargamesillustrated.net/programmed-wargame-scenarios-for-solo-and-multiplayer-games/