

A surprise, to me at least, last week Victrix Games announced that they had stock of a new rule set by Peter Heath, published by Anschluss Publishing called The War on the Ground, which is a 1:1 scale system for WWII that will typically see between a company and a battalion, together with supports, artillery and air support, fighting it out over the Normandy.
Victrix are just getting into WWII plastics at the 12mm scale and in my latest routine newsletter e-mail I get from them, came news of these new rules for £16. My order went in and a week later they arrived.
So this post is just offering some early observations of the rules and in the way that I often do, I will use a small AAR with an exploded first turn to examine the sequence of play and system in a bit of depth.
Please use the ‘read more’ tab for the rest of this post.
This is just a reminder that I am not a review site. I just write about things that I like and that I have paid for. So my posts tend to be upbeat and not necessarily critically objective, however, I always hope that my comments are a fair reflection of content for those trying to make buying decisions.
In fact, Anschluss Publishing have put three tutorial videos up on their website, so readers wanting to know more can have a closer look for themselves. I used these to make my buying decision. The link is in the Resource Section below.

The War on the Ground is a soft back, 64 page, perfect bound, A4 sized ruleset, with a single double sided full colour play aid.
The book holds the core rules to the system, gives some scenarios and includes the vehicle and unit stats needed to play those scenarios. It is the intention that follow on scenario books will be published and that these will have the benefit of not being rule set or scale specific, but they will continue to add the unit stats that accord with this system. Judging by the scenarios in this rulebook, I can see those follow on books being popular.
One of the things that made me want to read the rules and get the game to the table so quickly is simply the presentation style. There is something of the old school feel about this that dials straight in to my nostalgic soft spot. The text is nice and large, reminding me of Flower of Chivalry by the Canadian Wargames Group, the approach to systems reminds me of Armour & Infantry 1925-50 by Wargames Research Group and the approach to presentation and content style reminds me of the superb Frank Chadwick’s Volley and Bayonet rules and all of this is in a smart, up to date production - what’s not to like!
There is of course also a memory of my early wargaming years when in the 80’s, Anschluss were publishing the series of booklets in the ‘Great Battles of History Refought’ series, so Peter Heath has been doing this sort of thing for a long time and it looks like Anschluss are back, up and running.
Ground scale is 1mm to the metre, so 10 / 12mm tanks engaging at 500 - 750 metres look fine to the eye and games are do-able on the family dining table. Vehicles are represented at one to one and an infantry section is a single base.
So an infantry platoon will typically be three sections and a HQ section and three of these will form the company. Depending on nationality, heavy weapons sections / platoons will hang off or around this or the parent battalion organisation. A company will typically be nine infantry bases with three platoon HQ bases and a company HQ. A tank squadron will be four or five vehicles. Off table artillery are in batteries of 8 guns or 4 guns.
Spotting is an essential ingredient to play and once spotted, sighting is maintained until it is lost i.e. a unit moves out of sight. If unit A spots, then when nearby friendly unit B also tests for spotting they get a positive modifier if they are on the same radio net as Unit A and so it goes.
This ‘discovering’ of the enemy can also form part of the pre-game, where a side can spend 5 game turns sending their reconnaissance forward to explore enemy positions and enemy units provoked into fire will become easier to spot. This is a nice feature as it helps keep reconnaissance type true to role. At the end of the 5 turns, that reconnaissance asset simply comes off the table.

 |
| Stats for the Panther |
It is this sort of thing, along with things such as track or optics damage that keep things entertaining when you have the likes of Panther V Sherman uneven type engagements. It also allows the stories of individual bases being able to tell their story, even though you, the player may be removed by several command levels.
For anti-personnel fire, units can combine their firepower to put larger volumes down and this likewise runs off a chart using a D20 and we get results such as Dispersed, Scattered and Shattered, each with their own definition of what a unit should do. For example dispersed troops will seek immediate cover and get reduced fire and movement. That status is removed at the end of the turn.
Shattered is reflecting heavy casualties and the penalties remain with the unit until the end of the game. Too many shattered units in a formation and effectiveness tests (read Morale / Training) that fall out of that are unlikely to go well!
Failing a Unit Effectiveness Test can cause units to falter, become unnerved, become shaken or rout and there are triggers when these tests should be taken.
Aircraft are included and you can use air reconnaissance over the battlefield and ground attack missions, the latter has an interesting mechanic of ‘estimating’ the distance to the target and the strafing / bombing run is based off that.
There are 5 detailed scenarios, the first is the smallest, using a 1.5 metre by 1 metre table and being the ideal introductory scenario, another is set on a 1.2 metre by 1.4 metre table, while the bigger scenarios are running off a default 6’ x 4’ space.
I really like the scenarios, they are an interesting read in their own right, which makes me feel that the planned scenario books will be worth a look.
Just taking one of these scenarios, Operation Mitten - 27th June 1944, we get a page and a half of background, then a list of forces, then notes (like special rules) and then victory conditions. The text rounds off with a summary of sources. For this scenario eight books are listed. I am aware that the author has an extensive book collection and that clearly feeds into the confidence that these scenarios seem to have. Finally we get a full page schematic map to translate to the tabletop and these are nicely done, very clear and very ‘wargamery’ - nice.
While I am sounding typically upbeat about this system, my initial learning curve to the rules did have some bumps, as these things do, but I will go into that in the conclusions.
As usual, my post is getting very wordy :-) so on with some action. I have set up a sample simple game to help me assimilate the systems, so for starters, it is a pure infantry / armour action, without any other elements and has intentionally been kept small.
I am not giving a full AAR, but will do my usual exploded look at the opening turn to examine the sequence of play and some of the inter-relationships of the system, that should give a good feel of the basic game engine.

Above - this is the table at start. Note after taking this photo, I moved a couple of German sections and the anti-tank gun forward slightly, so they were behind the next hedge line on the other side of the road.
It is late August 1944 in France.
Table space - this would fit into a 3’ x 3’, I am using a 4’ x 3’ and there is spare unused table all around.

Forces - The Germans are defending a small hamlet (la Ferme). They have a platoon of infantry, supported by an MG42, a Panther tank and a PaK 40 anti-tank gun. The infantry platoon is a single organisation, the MMG, tank and A/T gun are independents. They are positioned in the hamlet and to the fields and hedgerow to either side. They have an Effectiveness Rating of 4, this means that they are average troop quality. The Panther has been given a rating of 3, which is a better quality.
 |
| American right flank - 'B' Company with armour |
The Americans are attacking. They will be player 1 in the game. They have two infantry platoons, A and B. Platoon A has a light machine gun supporting it. In addition they have a platoon of Shermans.
 |
| American left flank - 'A' Company |
I took a rough points count of the troops involved and the Germans have 69 points, while the Americans have 169 points.
Orders - The Germans simply have defend in place orders (hold). They have been given contingency orders to fall back onto the orchard if they are overwhelmed.
The Americans orders are to take the hamlet and secure it (advance and hold). Company 'A' will frontally assault. Company 'B' will move up on the right to sweep around and make a flanking attack into the town. The Shermans will be situated between the two infantry platoons, move to within 300 metres (30cm) of the hamlet, stop and give supporting fire to the infantry assault.
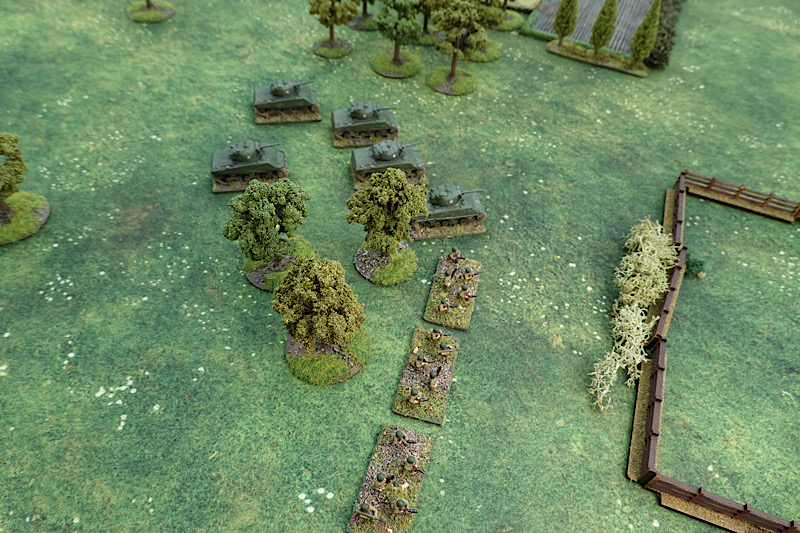
 |
| The German Panther in Henri's Field. |
So here we are at last!
The sequence of play.
Joint Initial Actions - We will ignore this phase as it covers the regulation of aircraft and artillery, which we are not using.
Turn Action Phase (6 routines);
Player 1 (American) moves - Reducing movement to 50% of allowance is one of the critical decision points of the system. It allows the unit to both fire and move and it also feeds into the various penalties. So here, we will have the infantry make at best speed since they are out of view of the German side and the Shermans can half move, so that they can still fire.
Player 2 (German) fires - they can fire anything of theirs that did not previously move more than 50% in their last movement phase. The Panther and the anti-tank gun have lines of sight to the Shermans, so they will attempt to shoot. First, they must ‘spot’ the target. The range is 360mm, cross referenced with the target size (2) at a target in the open, gives a base ‘to hit’ of 2+ on a D10 (roll a D10 and get equal or better than the base value). There is however a modifier of -1 to the base score for the target moving, so the base hit is now 1+, an automatic spot since the die roll cannot fail.
With two targets spotted, the shooters must test for ‘to hit’ on the Direct Fire Table. The Panther’s gun is 75mm and over 55 calibre (it is the superb 75/70), firing at up to 500 metres, it has a basic ‘to hit’ of 7+ (on a D20). The modifiers are +1 for a rate of fire bonus, so they need 8+ on the D20 and they roll 17, getting the hit.
The Panther’s fire value at this range is 15 and the front armour of a Sherman is 7, so that difference gives the Panther a +8 advantage. We go to the Penetration Table and roll a D20 on the 8 column. We roll 20 (high is best) and get a Knock-Out!
For the record, a roll of 6+ would have been enough for a knock-out in these circumstances and even lower could inflict damage. Regardless, once you are rolling on this table you will in any case get at least a ‘Disperse’ result (tanks close down).
The PaK 40 now successfully spots, fires, hits and scores an ‘Optics Damage’ on another Sherman. This means that the Sherman will suffer a +3 modifier when it fires, for the rest of the game. Another ‘optics’ result will knock the gun out of action.
The German infantry do not have any targets to fire at because they do not have a line of sight to the American infantry, due to the hedge blocking potential vision (the Americans are beyond the hedge, not yet next to it).
Player 1 (American) fires - They may fire with units who have not exceeding 50% of their movement, so the Shermans can fire. The first Sherman attempts to spot the PaK 40, which has fired, so is easier to spot, despite being in cover. The spotting is successful, so the Sherman can combine it’s main gun fire with it’s machine gun fire value, but first, we will see if another Sherman can also spot the anti-tank gun. The second test is a bit easier because a fellow on the same radio net (the first Sherman) has now already spotted.
 |
| The anti-tank gun takes a disperse result |
The second spotting test is successful. This means that both Shermans can combine their firepower to put a lot of fire into the target area. The dice roll is quite low, but they manage a ‘Disperse’ result, which means that the target must seek cover and will have penalties on movement and fire for the rest of the turn.
The two remaining Sherman’s fire on the Panther, both spot and hit. The Sherman fire value at this range is 11, but the front armour of the Panther is 10, So the Shermans will only be rolling (with D20) on the 1 column. They need 15+ to harm and 20 to Knock-Out. The two Shermans roll 18 and 12. The 18 gives an ‘Optics damage’ result, so for the rest of the game the Panther’s fire will suffer a penalty.
I like that there is a chance of causing some harm here at under 500 metres. The Sherman will be firing more in hope and desperation, while the Panther will feel fairly safe, but not take anything for granted - good.
Player 2 (German) can move - This is an interesting part of the turn sequence for the defender because it allows for shoot and scoot type tactics. In this instance, the Germans do not want to move anything.
Player 1 (American) fires again - as before, providing the unit has not moved more than 50% of allowance, it can fire. They fire at the same targets as before, since circumstances have not changed and the previous targets therefor automatically remain spotted. The shots against the Panther become a bit easier because the Panther now counts as being acquired.
Again both Shermans hit, even the one that has damaged optics, but they fail to do harm when rolling on the Penetration Table, however, even a fail causes a Disperse result on the Panther ..... they button up and will pay a penalty while firing this turn.
 |
| The Panther is marked to show it is dispersed and has optics damage. |
Player 2 (German) fires again - The Panther and PaK 40 fire again. The anti-tank gun selects the same target as it is now acquired. The Panther must spot for a new tank to attack, since it knocked it's last target out. It does, but both firers miss! though the Panther is dispersed and has damaged optics, which all conspired to lower shooting performance.
Joint End Action Phase;
There are no airstrikes to be done.
Unit Effectiveness tests - none are needed as the target formations did not suffer enough loss to act as triggers.
The Pak40 and Panther each lose their dispersed status
Next turn ..... and so it goes.
As our game opens up, a second Sherman is brewed and then with some collective HE and MMG fire from the Shermans, the Pak 40 is destroyed.
 |
| The anti-tank gun is destroyed by concentrated fire. |
The trade of fire between the remaining Shermans and the Panther is not likely to bode well for the Shermans, but their fire on the Panther does get them a track hit (reduces the tanks movement by 50%), followed later by another track hit, immobilising the Panther, but the good crew stayed with the vehicle .... it was now a pill box, immobilised and with damaged optics!
 |
| The two surviving Shermans move forwards leaving 3 burning hulks behind |
Above - with the loss of another Sherman, the decision had to be made whether to withdraw the remaining 2 Shermans or have them press on across the field to help 'B' Company assault the hamlet from the flank and also to escape the line of fire from the immobilised Panther. Moving this way would in effect immediately negate the Panther threat. Which is what they choose to do. Their ‘Faltering’ status (due to losses) means they move towards the enemy slowly.
 |
| 'A' Company line the hedge and drive off the enemy MMG |
As for the American infantry, ‘A’ company on the left, brought the hamlet under a lot of fire, driving the ‘Shattered’ MG42 back to take refuge in the rear part of the building and also sending a ‘Shattered’ German section running back over the fields.
‘A’ Company (minus 1 section that had itself become shattered) decided the time had come to leave the hedge line and advance, cross the road and move into the field opposite.
 |
| American 'B' Coy enter the lane and a firefight starts with the German section. The American section is lost. |
Above - ‘B’ Company on the right got mauled as it crossed the road and started to press onto the right flank of hamlet, chasing a German infantry section back into the buildings.
 |
| The rest of 'B' Coy press on towards the hamlet, supported by the Shermans |
The Shermans trundled along with them to give fire support, but one of them carelessly got too close to the buildings and a panzerfaust took it out.
 |
| A casualty to a panzerfaust! |
Amazingly the one remaining Sherman held its ground and continued to support the infantry assault.
 |
| An escaping German section and American 'A' Coy taking very heavy casualties from the MMG |
But here, we have the final unravelling. On the American left (above), another American section got badly shot up by the re-located MG42 and on the right, plus an American section was lost during an attempt to storm the hamlet over on the right (B Coy).
Hanging on by their fingernails and having taken many casualties themselves, the German defenders had somehow managed to repulse the attack, as the Americans, unable to carry on, began falling back.
Conclusion.
That turned out to be a fun exercise and really, right up to the last moments, I was ready for either side to break off the engagement, so a tight game indeed, which considering it was a non-tested plonk down scenario, bodes well.
In running the rules for a test in a first game, by mid game, I was starting to find that some of the principles were becoming more second nature to play and even remembering some of the various fire strengths at different ranges. I even at times got to the point of rolling the dice first to see whether the score was good enough to even have a go at the calculations.
However, that is not to say that I found this first play an easy play. The rulebook was in my hands quite a lot for referencing and checking things up and inevitably, I got some this wrong, getting hung up a bit on as to who and when should take Effectiveness Tests, which is the morale engine of the system.
First impressions pre-play were that there are quite a few charts with modifiers and that the sequencing of some rule passages are awkwardly placed or too brief. However, the charts quickly become intuitive, the modifiers are the ones that you would want for this sort of game (i.e. the ones that matter) and the rulebook is short enough that you quickly become familiar with finding the rule you want. It does remain the case that in some places, the rules are brief enough to leave questions or doubt, something that more examples would have mostly dispelled.
The rulebook has 4 blank pages in the rear for players to write notes, something that I doubt I could ever bring the pen to do! So perhaps this space could have been better used to give some play examples. The few examples given in the book are clearly done and helpful to the text, so I think more of the same would certainly work.
I sent a couple of e-mails to the designer and he was very supportive and prompt and I am told that shortly there will be a Q&A type document going up on their webpage to help with such things.
I thought that the rate of movement over the table and the rate of loss, set a tempo that felt right for the subject. The rules force you to think in terms of formations and no doubt in a bigger game, reinforcements and fresh troops will have their proper historical significance.
I have generally found spotting in games a bit of a bind, but it works here to bring some interesting nuances to play. In today’s game, as ‘A’ company got up to the hedge line, they spotted German units faster than they were spotted themselves, so that was a nice touch as things slowly became revealed. Plus as more ‘A’ company bases successfully spotted the enemy, they were able to combine fires and force German units to pull back.
Had the Germans had better luck with their own spotting, the Americans would likely have had much less effective fire as they would be taking Dispersed and Scattered results, making it harder for them to get their attack actually moving.
Although mine was but a sample game with few unit types, I thought the gun / armour relationships worked well and I particularly liked the fact that the Shermans at these close ranges were capable of inflicting some discomfort on the Panther, which would have been the case.
The Optics and Track damage results add interest to the game and help with the overall narrative and during play, I definitely felt that I was witness to a credible unfolding story.
A strong element of the rule set are the historical scenarios and the author does a good job with these, from content to layout.
Overall I am pleased with my purchase and enjoyed my game with these rules. With Victrix now joining the smaller WWII scale and with their advertising power, a renewed interest with battalion level games and systems is likely going to be reflected in our wargaming media.
EDIT - I have been spending a lot of time with the rules and find some brevity in the actual presentation that can cause ambiguity. I have been putting down some work for the author that should help iron things out in the Q&A download that he is preparing.
Complexity - World War II tactical by its nature can be a complicated subject, but these rules concentrate on the important bits and are concise for that and written in a gamer friendly style. You are left with the impression that the author knows his subject well and is at ease with modelling the various aspects.
This is probably a medium complexity level system, initially made a bit harder for me by my entanglement with the ‘Effectiveness’ rules, but I have got there now and I think a first playing, plus the proposed Q&A sheet will make for a smoother learning curve. I would put it roughly level pegging with Pendraken’s Blitzkrieg Commander, perhaps even a tad easier, while the other new set out (O Group by David Brown) looks to be a bit more involved.
As with all these sort of games, investment in learning is rewarded by the number of scenarios and the hours of gaming sessions that can then be created, once you have the system under your belt.
Size - The ruleset is a slim, perfect bound volume and will not trouble the bookcase. The gaming space would seem to default at around 6’ x 4’, but as shown today and in two of the scenarios in the book, smaller game spaces can give good games. The game runs off a single play aid, but I think players will want to make some unit stat cards so that they do not have to be continually referenced in the rulebook.
The rules describe themselves as being suited to 10mm, 12mm and 1/144 scale. The game shown here today was with Pendraken 10mm models. I think you could move to 15mm without too much fretting (it might look like a Flames of War game), though bigger than that, the gamer may want to convert centimetres to inches or double the centimetre measure, either way, that would need a bigger table, but visually the relationship between vehicles and the aesthetics of range would look better for doing that.
The introductory scenario looks a very interesting game. The Germans have a force of one company of Infantry that already start play ‘Shattered’, plus a single Panther tank. The British have just a squadron (4 tanks) of Shermans, so not many troops at all and ideal for learning the basics.
Solitaire - The game is typical of many two player games in that it can be played solo, just do the best you can for both sides. Today’s session was a solo play.
There is a section called ‘Confusion of Battle’ which allows a player to put 20mm x 20mm chits face down on the table to conceal the identity of their force, plus for every chit placed you can place 2 dummy chits. This of course would need two players, but it is not the kind of thing that has ever stopped those of us who dabble with solo play ...... plus I dislike mechanics that leave you confused about what you have and where, which such things do - it’s only meant to confuse the enemy, not the army commander, but these things can have that effect! or perhaps that says something of my own limitations :-) So yes, fine for solo games.
Time - The introduction says a large game can be played in 2-3 hours. The scenarios have lengths ranging from 22 to 30 turns. I lost count of how many turns I played for, but it was probably half of that and of course familiarity should see play speed pick up. I was probably playing for over 3 hours, but writing notes, taking photographs and checking rules, so once learned, this game should be delivering single session big games. There is one movement and two fire phases per side per turn.
Resource Section.
Anschluss Publishing Tutorial Videos. LINK
https://anschlusswargames.com/pages/tutorials
A very good review Norm an it looks like the rules provided a fun game with some interesting nuances
ReplyDeleteThanks Keith, I'm looking forwards to exploring them further, particularly having a look at artillery process and effect.
DeleteSounds very, very interesting!
ReplyDeleteThank you sir!
Thanks Michal, with new rule sets out and new manufacturers to the party, I can see battalion level WWII getting a lot of interest in 2021
ReplyDeleteAll I remember about Peter Heath was his claim his group did not play toy soldiers, they did ‘histogaming’. The article was accompanied by photos of Mr H and chums playing with toy soldiers... I think the rules series was called Ebb & Flow or something and were pretty much unplayable!
ReplyDeleteHi, there were a lot of Anschluss booklets around at the time, always something of interest to bering away from the wargame shows. I think in those days, despite our rose tinted spectacled view of ‘simplicity’, complexity was being seen in many wargame products, almost as a way of giving credentials to realism. The simplicity thing was really the generation of games before, the true Featherstone / bath / grant era.
DeleteThanks for the overview and quick game report of these rules. Your thoughts and points raised are always interesting to read.
ReplyDeletePeter, things here to interest you as I think you like top down systems.
DeleteThank Norm a really helpful and thorough review, I am increasingly looking for elegant simplicity in rules, which give that flavour of a period. It sounds like these rules probably aren’t for me. The game looks great by the way 👍
ReplyDeleteThanks Matt, there are things that you have to either hold in your head or note down such as who has spotted who, but overall, I found my game small enough to cope with that and it does draw you into the nuance a depth of play. When we get shows going again, a smallish table with the rules demo’d would likely catch a lot of interest, as the the games can look visually good.
ReplyDeleteThanks Norm for the review and example of play. These rules have completely escaped my notice! They seem to have a good balance between playability, historical results and narrative. I am lucky I am not collecting WW2 rules at the moment or would consider buying them :-)
ReplyDeleteThanks Shaun, if it wasn’t for the Victrix e-mail, I would have initially missed them. I think the author is very comfortable with his subject.
DeleteThanks Norm, a really good write up. I started with the old 73 version of the WRG rules many years ago. The only down side was the large number of infantry elements, separate LMGs etc. This set removes that barrier. Inline with this these maybe worth a look.
ReplyDeleteDave, they do strike a chord with the WRG memory with slow moving infantry having their proper place, radio nets, beaten ground type templates etc.
DeleteWith the mention of 80s rules I immediately scurried down my spider hole, nonetheless I read on. A fair and measured assessment of the rules, I don't see that they bring anything to the party that Rapid Fire or Battlegroup doesn't bring for me though, I don't follow why as a company or battalion commander I would be interested in whether a tanks optics were damaged, just need to know if it can move and or fire I would have thought.
ReplyDeleteThanks Phil, an interesting point. I play the Hexasim napoleonic boardgame, which puts the player in the army commander role, but you still get the joy of the in hex nuanced actions, though the results are varied and a bit out of your direct control and so in some respects at the engagement level, you cross your fingers and hope that good training and discipline and a bit of Lady Luck will help you. These rules do a slightly similar thing with the D20 combat and formations subject to tests as elements take losses, so against your wishes, you may see a platoon etc, pull back, abandon a position etc, even if you think that it would have been viable to keep them there.
ReplyDeleteI can see the scenario books catching your eye :-)
I shall certainly keep an eye for those.
DeleteThanks for the review Norm and the rules are intriguing and certainly appear to have some neat mechanisms too them. The scenario books sound good too. However I think I'll stick with BKCII as I know the rules so well and they always give me a good game.
ReplyDeleteThanks Steve, I don’t think hopping between sets is ever as good as finding something you like and sticking with it. It will likely be an area of interest for those contemplating the recent Lardie videos.
DeleteI think the follow on scenario books could be an interest to BKC fans.
First, your game photos and table layout are superb. Second, your review is first rate. I would enjoy seeing your perspective on products you don’t enjoy so that we can get a more comprehensive view of your personal preferences. A concise, set of WWII tactical rules may be a welcome entry into the period. I had not heard of these before now but a NorthStar advert dropped into my mailbox this morning announcing them. You are ahead of the curve and first out of the box. Is this game set at the same level as, say, Squad Leader?
ReplyDeleteThanks Jonathan, Sometimes I get a product and start the blog process off, only to discover after investigation / play, that I am not that keen and those draft blog posts get binned. because my articles are long, I just don’t have the enthusiasm to write about something I have not enjoyed and would rather just get o with the next thing, which is why I often remind the reader that i am not a reviewer in the usual sense of the word.
ReplyDeleteit also keeps the blog with a positive tone.
Interesting to compare with squad leader as you can still jump sections over hedges and be firing single panzerfausts etc, but i would have to say that it is a level up, as you tend to be thinking in terms of platoons rather than squads, though in reality a squad leader scenario could easily have the number of ‘elements’ on the table as I had here.
in that regard, you can have the same tactical action, but you focus is slightly pulled away to a different command level. In some respects that is because Squad Leader doesn’t have a command / organisational structure, if it did, they could be more simiilar
Norm, what gets binned might make for some interesting reading but I understand your position very well. Is the BMU a squad (section) or platoon in these rules? That is, does each squad act independently or does each platoon act independently? Are Unit Failure Tests at the squad (one stand) or platoon (four stand) level?
DeleteIndividual bases are sections, single support weapons and single vehicles, though they are grouped into platoons and company. The Sherman platoon will be 4 tanks plus a platoon HQ tank. They will have an order written for them, so although the individual bases move and shoot separately, they will be acting in unison as a platoon, moving together and working towards the same objective, within the command radius of their immediate HQ.
ReplyDeleteAs the tanks get knocked out, the platoon takes a test (effectiveness test). They may pass, but depending on circumstances and current losses, they may falter, become unnerved, shaken or even rout, that status will apply to the whole platoon and stay with the platoon until it can rally the effect off. A rally is a re-test, so it might even score worse!
That is the reason why I left my two Shermans ‘faltering’ and advancing really slowly, because a rally test might have actually seen them pull out.
if the platoon becomes shaken or routs, then the effectiveness test also escalates up to company level, so that all platoons within the company might suddenly find themselves adversely effected.
So as you play, each base plays and feels like it is acting independently, but in reality, it is held hostage within the local and higher command structures.
Got it! Thanks for the explanation.
DeleteNice AAR and good info on these rules. I bought them but not read properly (as been concentrating on O Group). Initial blush was disappointment at low numbers of unit stats included I mean a WW2 set with no Tiger details !! Hopefully get a another gander at them soon. Great looking minis and table as well
ReplyDeleteThanks Gary, I am told that the next scenario book is not too far away and that will have things in like the Hetzer and Tiger, but I know what you mean, I picked up my Iron Cross rules tonight and they have some goodly data in the one book and I dont think gamers generally want to be drawn too far down a Codex route.
ReplyDeleteI know the author is working on a Q&A document and I think once that is up, the rules will have a smoother learning curve. I am following your encounters with O Group and will be interest in any comparisons that you have between the two sets.
In O Group the combat/stats and suchlike (especially spotting) is very broad brush and simple overall but works for 'level' of game. The real meat of game and the key decisions to be made are with the Orders rolls and accompanying actions and this part of system is rather good imho. Different beasts :-)
DeleteThanks Gary, as different beasts and both being sold by Victrix, it will be interesting when the videos of Vloggers start showing some comparison games fought over the same battlefield. I'm sure there will be a lot of Lardie vids.
DeleteFantastic Norm, a great looking game on a great looking table, as always. And thank you so much for all the work breaking down the rules for us, I greatly appreciate it.
ReplyDeleteV/R,
Jack
Thanks Jack, I know the huge effort you put into posts, so I appreciate that.
DeleteThanks for this post which I found very informative. I was unsure if these rules were for me, but your article has made my mind up for me. I'm in!
ReplyDeleteHi Ellis, I think the rules would work at a level that would suit your group. The heart of the game works well and the attack charts are slick.
ReplyDeleteThere is some brevity in the actual presentation which can cause ambiguity, but I have spent quite a lot of time with the rules and have been putting down some work for the author that should help iron things out in the Q&A download that he is preparing
Thanks for reviewing these Norm. Sounds like another set I'll be passing on, just waay too much detail for the level of command represented for my tastes.
ReplyDeleteHi Martin, I needed markers to remember who had spotted who and I have yet to plug the artillery in, but I would put it around average complexity with the player in the role of either battalion or company commander. The D20 loosens up players actual macro control, but jonathan’s question posed above about similarity to Squad leader and at the tactical end there are strong similarities, while SL is really without a top down command system, so I do see your point. Hopefully in the near future there will be some blog / vlog commentary on someone comparing the same situation using both these and the also new O Group rules for comparison, as Dave Brown does take a ‘top down’ approach to his systems.
ReplyDeleteI really like the style of the expanded first turn during the review. And your table looks ace as well. 😀
ReplyDeleteDid you enjoy these enough that the game will see additional play? And it seemed odd to me that at that scale some units (like tanks) are individual. Seems like a lot of work to track which tank might have optic damage.
Spotting rules are sometimes hard to do on the table top but it looks like these work alright.
Thanks Stew, the scale of squads and individual vehicles is pretty common for tactical and the game aims for company to battalion games, so I think that is OK. Tracking optical damage and track damage, plus dispersed etc is easy enough, the harder bit is keeping tabs on who spots who.
ReplyDeleteUnfortunately, some work, plus the blog post and then extensive correspondence with the author has kicked off an RSI problem with my wrist, so I am resting it up and (trying :-) to stay away from the keyboard!) I have invested quite a lot of time with the rules, so it will go back to the table, but I will wait until the Q&A sheet is up on the website, plus my wars of the Roses figures are also calling as is my new Wakefield boardgame :-)
Hi Norm, that was an excellent read once again. The scenario played out really well and certainly reflected the tension of battle, it really drew me in. Of course the table and troops are great, the brewed up Shermans most impressive with the flame markers. I like the hit results reflecting different damage aspects, knocking out the optics or damaging the tracks etc, most realistic. 12mm is perfect scale for these I guess.
ReplyDeleteThanks Lee, i re-ran the scene in 1/72 and 5 Shermans grouped just stressed the smaller space too much, but I may try on 6 x 4 and see what that looks like. I am very much enjoying your Epic project.
ReplyDeleteInteresting and entertaining post and it sounds like a good balance between accuracy and playability, I think my group will stick to bolt action as we almost know what we're doing now!
ReplyDeleteBest Iain
Thanks Iain, there is much to be said for sticking with a system and getting to know it properly and maximising playability.
ReplyDelete