

This is an opening post that describes a small / short WWII campaign game that is based upon a marriage of scenarios taken from Neil Thomas' One Hour wargames and 'O' Group rules by David Brown.
Please use the 'read more' tab for the rest of this post.
We are somewhere on the eastern front in 1943, using the scenarios from Neil Thomas’ One Hour Wargames book to populate our campaign ladder. If you use the fast play rules that come in the same book, the campaign could easily be concluded over the course of a day.
I will be using the 'O' group rules. What follows will be a description of how the campaign was set up and an AAR of the first battle.
The campaign is based around 5 individual table locations (zones), numbered 1 - 5. The Germans (initially defending) control zones 1 - 4. The Soviet’s (initially attacking) control zone 5.
 |
| The campaign ladder after scenario population |
Zone 3, at the centre of the ladder is an important objective in the campaign as it ensures victory and this will be fixed as being based upon Scenario 23 (Defence in Depth) from the OHW book.
The other 4 zones will have randomly selected scenarios from the remaining 29 scenarios in the book. I drew numbers from a cup and was able to populate the other zones with scenarios as shown in the above graphic.
The attacker starts on and owns zone 5. The first battle will be an attack from zone 5 into zone 4. If the attacker wins and takes zone 4, they will be able to start the next battle as the attacker and attack into table 3 etc. If the attacker loses, then the defender will become the attacker in the next game and will counter-attack from zone 4 into zone 5 and so on.
The campaign ends immediately if the Germans lose possession of zone 1 or the Soviets lose possession of zone 5. Otherwise the campaign ends after 5 battles have been played and the winner is determined by points in which each zone currently controlled by that side is worth 1 point. The side with the most points wins.
In each battle, the table will be 3’ x 3’ size as per the standard OHW scenario requirement and the action will be executed as per the scenario instructions as given in the book.
The figures shown here are 10mm Pendraken, terrain is from S&A Scenics, Timecast, Pendraken and Battlescale. The cloth is from Geek Villain.
Choose your rules. I will be using O’ Group by David Brown. To make them work for forces this small, I will reduce the number of command dice rolled at the start of the turn from 9 to 5 for armies getting six units and from 9 to 4 for armies having less than 6 units, reduce the FUBAR rate from 4 units destroyed, to 2 destroyed and restrict the maximum number of dice that a HQ can hold to 3 (instead of 6).
In each game, the order of battle is selected as per the OHW generic system and scenario, plus the attacker always gets a bonus of one pre-game artillery bombardment against one target or geographical feature visible from the attacker's base line, using an off board mission of medium artillery (one use only). Accuracy must be rolled for. Note, OBA is not catered for in the OHW system.
While OHW gives generic unit types (i.e. a tank is simply a generic tank), when creating orders of battle prior to each of our games, we will allow some variety and specific unit types to be created. For each generic unit awarded to each force, roll 1D6 on the following table to properly establish the unit type, which will work with the 'O' Group rules.
 |
| Chart to establish unit type |
With OHW giving us our scenario and Orders-of -Battle and with the O’ Group the rules, we are ready for the first action.
Soviet controlled zone 5 attacks German controlled zone 4, this gives us OHW Scenario 14 ‘Static Defence’. Scenario instructions have both forces beginning with 6 units. They roll on the force creation table in the OHW book, both sides roll a ‘3’, so both sides get 3 x infantry, 1 x A/T and 2 x tanks - all generic.
Using our Unit Type conversion table above, the Germans get 3 x Panzer Grenadier platoons, 1 x Marder III section, 1 x StuG IIIg section and 1 x Panzer III J section. That is pretty good for a defending force (it would actually be a good attacking force!).
The Soviets get 1 x Rifle platoon, 1 x Rifle platoon plus MMG, 1 x SMG infantry platoon, 1 x 57mm A/T section with truck and 2 x T70 tank sections …… Oh Dear!
The scenario is interesting as the defenders (German) have to keep two units within the vicinity of the hill and also another two units within the vicinity of the village, while the Soviets only need to take one of those objects. Since the objectives are on the flanks and separated by a woods, the Soviet player can choose their objective and concentrate all of their units up that flank - avoiding the other defended objective altogether.
 |
| our 3' x 3' table looking from the Soviet side of the table. The hill or village is an objective |
The OHW tables are typically very sparse, in this game only the hill, village, woods and road are on the table, so adding a bit of scatter terrain helps the look.
I set the defenders up and then rolled a dice (50/50) to see which objective the Soviets would assault ….. they 'got' the hill on the left side of the table.
Next I executed the pre-game Medium Artillery Stonk that I am allowing at the start of every new battle.
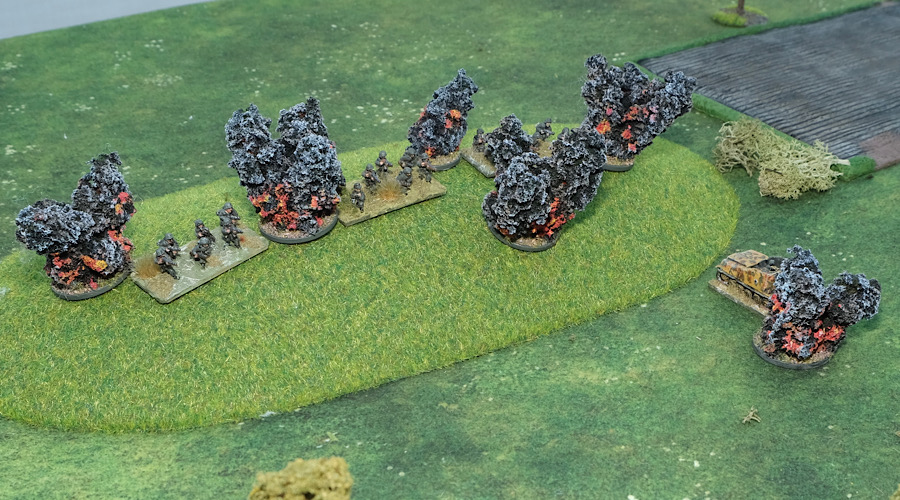 |
| Pre-game artillery barrage |
They targeted the infantry platoon on the hill and the shells also just caught the Marder III. It didn’t cause casualties, but the three hits on the infantry platoon suppressed them.
 |
| Panzer Grenadiers defend the front edge of the wood, note the Panzer III lurking to the right |
Opening moves - The Soviets advanced en masse up the left side of the board. Their T70’s raced to a field barrier and with good shooting, each hit the German StuG, but failed to penetrate the armour. Their very effective 57mm A/T came up to the same hedge line deployed and immediately put damage onto the StuG (a vehicle represents 2 - 3 vehicles, called a section, damage represents destroying a vehicle in that section), but the Panzer III unit, located near to the village, skirted the woods and started to pump shells into the thin flank armour of the T-70’s. The little tanks would have to press on to get out of that line of fire.
 |
| Soviet tanks and A/T gun take position at the field boundary, to their right is a platoon of Soviet SMG, which will attack the Panzer Grenadiers in the wood. |
Kaboom - shot after shot from the StuG, Marder and Panzer III destroyed the two Soviet T70 sections.
Mid Game - The battle was breaking down into 3 distinct localities. Firstly the Soviet SMG platoon was engaged, firing from the fields, at the Panzer Grenadiers in the woods.
Secondly, the 57mm A/T gun was still sitting by the two brewed up T70’s, attempting to defeat the StuG / Marder up ahead, whilst still suffering shell fire from the Panzer III by the village.
Thirdly, two Soviet infantry platoons had advanced close to the hill. The first platoon with the MMG started to fire at the Panzer Grenadiers on the hill, while the second platoon went ‘tank hunting’, closing in on the StuG. The StuG responded just in time and was able to back out of the trouble, putting itself on the rear side of the hill. Not wanting sole attention from the Soviet anti/tank gun, the Marder likewise pulled back behind the crest of the hill.
 |
| Tank Hunting! |
It all hangs in the balance! Both sides were trading fire, without either gaining any real advantage. The two Soviet infantry platoons were bringing the hill under increasing pressure. To support the hill line, both the StuG and the Marder crawled forwards up the far side of the hill and took hull down positions on its crest - but both were quickly lost to the excellent gunnery of the 57mm anti-tank gun.
Literally just one Panzer Grenadier section was now holding the hill.
The 2nd Panzer Grenadier platoon in the woods disengaged from the SMG platoon and cut back through the woods to aid their comrades at the hill, but the SMG platoon followed up and attacked them in the flank. There was a moment of panic when the Panzer Grenadiers tried to escape back to the village (but failed their withdrawal die roll!) and a well respected junior officer organised a hasty defence and against all the odds, the Soviet SMG platoon were forced to retreat back out of the woods.
Final moments - The Panzer III was lost to the tenacious 57mm A/T, with much encouragement of course from the Company Commander (additional orders spent) and then that final Panzer Grenadier section holding the hill was removed from play by fire from the MMG.
 |
| Panzer Grenadiers leave the wood and catch the Soviet rifle platoon by surprise |
The 2nd Panzer Grenadier platoon made a dash from the woods towards the hill to secure it, catching a Soviet rifle section off guard and forcing them to retreat a goodly distance, but the grenadiers were driven off by the fire of the other Soviet rifle platoon with its MMG. Losing one section (base) in the process, they hastily fell back on the village, leaving the area and hill uncontested and allowing the Soviet infantry to capture the hill, giving them the game.
Conclusions.
That was actually quite a tightly fought game, with moments of drama for both sides, which ‘O’ Group is good at introducing.
The ‘working relationship’ between the OHW scenario / instructions and the ‘O’ Group rules worked quite well. Obviously the scenario set-up is pre-established, so I didn’t use the ‘O’ Group opening procedures for that, but the play itself ran smoothly and tweaking some of the various aspects of the rules, such as reducing the number of order dice and HQ size, did help this smaller scenario, as 'O' Group is designed for a battalion level game (not company).
The OHW scenarios always play for 15 turns, our game today took 11 turns, so I am happy with that. Very early on, I thought there was going to be a Soviet disaster as the two T70 units fell so quickly, but the stalemate by the mid game and final push at the end did turn out to give a convincing Soviet victory.
Which was fortunate, as otherwise, with the Germans as winners, in the next game they would have counter-attacked into zone 5 (Scenario 10 - Late Arrivals) and another German win there would have ended the campaign rather prematurely, but these possibilities have to exist to give the campaign some edge.
One of the things that I like about these sort of campaigns is generating the forces before each battle. I am quite pleased the way the above unit conversion table adds some character to the units, which the OHW system generates as generic. Even little things like getting a MMG with a rifle platoon can add a lot of character to the scenario (it did here), but of course getting a rarer heavy tank, such as a Tiger or SU 152 SPG is bound to show up at the wrong / right time for one or other of the players - perhaps even in that critical battle!
Our next battle will have the Soviets attacking from their newly captured zone 4 into German held zone 3. This is an important battle, because that particular zone is the campaign swing zone, as whoever owns it will already have 3 out of the possible 5 victory points. This will use OHW scenario 23 - ‘Defence in Depth’. See you there!
Resource Section.
This is a blog article on a previous ‘O’ Group small game. LINK
http://battlefieldswarriors.blogspot.com/2021/09/assault-on-strassengabel-o-group-game.html
This is a blog article on a previous look at One Hour Wargames. LINK
http://battlefieldswarriors.blogspot.com/2015/04/1-hour-wargames-initial-look.html
This is my sister paid for webspace COMMANDERS, which is having a bit of a make-over, with a view to highlighting some of my main project / game interests. This week it has been looking at the 1809 project and there is a link there to a very useful 1809 free PDF download. LINK
Quite a tense affair, I am looking forward to the next campaign turn.
ReplyDeleteThanks Peter, I think for a bigger campaign, it would be good to introduce your ‘weather barometer’ that you just posted about. That would just bring in another element of interest.
ReplyDeleteGreat report and mash up, your force selection chart is particularly good may have to try something like this for our connected scenario battles over the winter. I went to Partizan with a view to buying O Group, I flicked through a copy and although it looks quite clear and easy to understand I just got overwhelmed at the thought of learning it all. Is this an age thing I wonder or am I just happy to continue with Battlegroup and Rapid Fire for larger than platoon games?
ReplyDeleteYou are not alone in your reaction, my friend.
DeleteThanks Phil, Battlegroup and Rapid Fire are solid designs that have stood the test of time, I think it is only natural to stick with what works. In truth, we probably have too much to choose from, better to get familiar and good at just one or two sets.
ReplyDeleteI am finding the force selection to be great fun.
Nice idea in using OHW scenarios in a linked campaign game. Although you say OHW yields sparse tables, you layout looks anything but. Table looks great.
ReplyDeleteWhat does O Group offer that draws you away from TaM? Interested in a change of pace?
Hi Jonathan, rather than drawn away, it is just a change of level (company up to battalion) and I quite like the ethos behind the rules and the way that the infantry fight as a platoon, with the section elements still being an obvious part of the Platoons DNA. The processes are quite slick and quickly become second nature.
DeleteIn truth, these campaign games are actually company games, which stretch ‘O’ Group downwards a little, so my open table TaM might have been a good way to go, while getting a bit more testing done.
An interesting and enjoyable post.
ReplyDeleteI really (really) don't like the OHW rules, largely because they basically remove all tactical options. However, the simplified scenarios do work well with all sorts of other rules.
We agree, Ross! OHW rules present games of attrition almost every time and grow stale very quickly. The scenarios, though, are terrific.
DeleteHi Ross. The rules are an interesting exercise in ‘bare essentials’ and with rules I think it is easier to like something that is not your main interest ….. but for a main interest (i.e. WWII for me) omissions are more likely to be felt. But as you say, the 30 scenarios are very useful and worth the admission price :-)
ReplyDeleteMy main complaint is the lack of tactical options. Each unit type has 1 and only 1 tactic in every era. Eg in all the firepower eras, extreme range has the same effect as moving up to point blank range it just allows the enemy to wear you down while you advance with no better effect when you get there. Something as simple as a long range penalty would make a world of difference by making players make choices. An easy tweak but its easier to just use my usual rules with the scenarios.
DeleteMy secondary complaint is that the force charts are designed so that no player may ever field an all arms force. I get around that by rolling twice on the 3 chart instead of the 6!
Damned handy simplified scenarios though!
Yes, it is the scenarios that make the case for the book. Most blogs that discuss the rules seem to employ their own tweaks to bring the rules to a better place for them.
DeleteGreat stuff Norm and a neat idea to use the OHW Scenarios to generate a campaign. I've used them for HoW and BPII, but never for WWII. This however has piqued my interest and will investigate further and I can see lots of mileage in this. Looking forward to the next battle:)
ReplyDeleteThanks Steve, even the simple 5 zone ladder I have used can be re-cycled with different scenarios from the 30 thrown into that grid and then a different era chosen and then ‘other’ favoured rules, so yes, a ton of flexibility and milage from these scenarios.
ReplyDeleteGreat stuff Norm, very exciting. I've done a few linked scenario OHW campaigns and they work very well. As you know, I've basically re written the OHW WW2 rules completely and the scenarios work well with any set of rules.
ReplyDeleteThanks Martin, its funny how a campaign takes on a life of its own from the very outset. I may find that I should have spent some time deliberately choosing the 5 scenarios and their positions on the ladder, rather than going down the random selection route - only time will tell.
DeleteGreat looking games and have to try someday this game!
ReplyDeleteThanks Michael, I think it would work equally well for your preferred medieval period.
DeleteVery interesting to see O Group ‘down scaled’ and useable.
ReplyDeleteHi Gary, you don't get the full utility of the rules, but you do get all of the 'O' Group processes and routines and it trundles along fine.
DeleteGood looking game Norm, you have put a lot of effort in developing the campaign and details I will need to come back to the post again later to fully absorb.
ReplyDeleteHi Matt, it lacks the admin phase that I usually go for, which allows the buying of reinforcements and the recovery of tanks from the field, which knits the campaign together, but with the decision to go purely with OHW scenarios, that was rather precluded and I think each OHW scenario is good enough to stand on its own two feet anyway!
ReplyDeleteGood thing the Russians won or the campaign would be over! I played once in a campaign similar but of course we never finished. 😀
ReplyDeleteIn ours the attackers had a larger force and the defenders had some small reinforcements. A lot like the pint sized campaigns you can get from TFL.
Hi Stew, yes, it was nearly a very short campaign! I’m not sure it is getting easier for them. For game 2, the Soviets have just drawn T-70’s (again), while the defending Germans will get Panzer IV G. There are however some quirky aspects to the scenario that might help them!
ReplyDeleteGreat stuff Norm, I always fancy the idea of a campaign but have only played one once - the Canadian Wargames Group Habitants and Highlanders FIW campaign, which was great fun! I thought the Russians were done for when reading the forces - its just as well they were able to concentrate on one of the two objectives - and lucky the AT gun managed to survive and take out a lot of the German armour - fingers crossed for a repeat performance in game two (well, you cant support the Germans nowadays, can you?!)
ReplyDeleteHi Keith, there is just something about the presentation style of the Canadian Wargames Group books that hits a sweet spot for me, perhaps a nostalgic thing!
ReplyDeleteI enjoyed my opening game for itself and for its setting within a bigger story. I am adding some additional notes over on my Commanders web page.
The next game looks equally tough for the Soviets and at the moment, I wouldn’t like to bet on the outcome of that one!
I didn't think the Soviets had much chance with the forces at the start,the 57mm did well,sounds like it worked well,be nice to get a game, let alone a campaign!
ReplyDeleteBest Iain
Hi Iain, the 57mm is pretty effective, but was perhaps lucky to stay in the game. Yes a campaign is a bit greedy :-) I am starting face to face gaming tomorrow, our first meet in 19 months!
ReplyDeletelate to the party here, Norm, this is a great idea. a tidy, compact campaign with lots of tension and a good set of rules to accompany it.
ReplyDeletethe static defense scenario is one of my favorites of the OHW lot. no shortage of decisions to be made for both sides. enjoyed, thanks!
Hi Steve, it has been a reminder to me just how solid these OHW scenarios are. They are great for throw down games and for rule testing etc. I might have a little dabble with Rapid Fire Reloaded at some point in the campaign.
ReplyDelete