Red Blitz is the latest module in the Old School Tactical line-up and essentially covers the east front, summer 1944. Designed by Shayne Logan and published by Flying Pig Games.
I have previously done a ‘first impressions post’, which details each of the scenarios and the rather interesting campaign game (link below in the Resource Section). So today we are just going to get into one of the scenarios - The Trains Must Run.
This is a pretty meaty scenario, with strong orders of battle and 13 turns. It uses two of the ‘pocket maps’ side by side. It is 1944, so that must mean Tigers and IS 2’s.
We are in the region of Minsk. The Soviets are closing in, but the Germans are desperately trying to keep the important rail hub open, to get supplies in and the wounded out. Arriving to help was 5th Panzer Division and it’s subordinate 505th Heavy Tank Battalion. This is just one of the series of clashes unfolding to the North of the city.
Interestingly (to me at least) one of the scenarios from my own set of figures rules Tigers at Minsk / Into Battle, was based upon the same subject - time for a return to that soon perhaps!
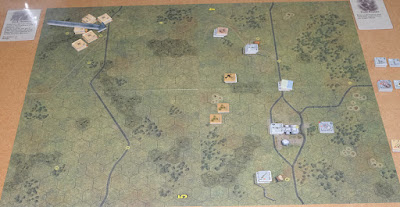
Anyway, the essence of this scenario is that the Germans (defending) set up on board 4, the Soviets enter on board 5. Board 4 has a simple road network, but in this scenario it is counted as railroad. The Soviets will win at the end of the game if they occupy any 5 railway hexes with good order units.
 |
| Opening turn, Soviet tanks and tank riders top left. The German line is thin, the brown markers are mines and a trench hex (with a HMG). |
They can however get a sudden death victory if at any point, they destroy 3 contiguous rail hexes. They have sappers and satchel charges that can do this damage. The German armour arrives as a reinforcement, but they do start with an 88mm gun that has hidden placement.
Note - in this system, the turn numbers count backwards, so we start on turn 13. At the end of turn 1 (last turn), a die is rolled and there is a 50 / 50 chance that the game will be extended by 1 turn.
Though there are 13 turns to the game, fresh Soviet units arriving on the western edge of the board, will take at least 4 turns of movement to reach the vicinity of the rail track.
Turn 13 - The Advance!
The module brings a heavy hitter to the systems Soviet order-of-battle …. the IS 2. This is a heavy tank with thick armour and large calibre gun …. but, it suffers from ‘limited fire’ due to ammo supply and a slow rate of fire, so how will it fare today on my first foray with it!
The German defences start with a dispersed crust of infantry spread along their front. They have a hidden 88mm gun and a thinly armoured Marder II.
The starting Soviet plan is to race forwards, concentrated out on the left flank, with the sappers mounted on their 5 tanks, to start destroying the rail lines with their satchel charges before the Germans can re-organise to meet the threat.
The five IS 2’s advance, there is much confidence in these heavies - then the German 88mm opens up and immediately nerves jangle as the high performance gun shoots. Even at this range (16 hexes … 800 metres), the powerful 88 hits the heavy armour on the zero differential column, rather negating the excellent armour on the IS 2.
Two shots, one hit, SLAM ….. phew, close, no damage! But it is only a matter of time.
The Soviets have to make a decision, H.E. fire from their 122mm tank guns is a great threat to the 88, but they cannot fire while carrying ‘riders’. Should they press on or have the riders dismount, so that they can engage the 88?
Two of the tanks discharge their riders and return fire on the 88, inflicting casualties.
The Germans use the rest of their impulse points to get their units to find the best cover within the hexes (the system allows units to try and find better cover within their hex, giving them an additional +1 in defence).
Turn 12 - In the first instance, Impulse points are spent on the duel between the 88mm Flak gun and the IS 2 tanks. The Soviets get the initiative, so get off the first shot - they miss, the 88 returns fire and an IS 2 explodes!
There is frantic fire between the two sides, with the 88 ordered to use ‘intensive fire’. No further Soviet tanks are hit, but an IS 2 manoeuvring behind brush gets a shot off and destroys the 88.
The lead Soviet tank comes within small arms fire range of the defenders and the riders (sappers) are hit, dismount and hit again (removed from play). It seems wise to dismount the rest of the force to advance on foot.
Turn 11 - The second wave of the Soviet attack arrive, following up the tanks, comprising of four truck borne rifle sections. The Germans hold their positions not wishing to weaken their left to serve the right! The Soviet lieutenant with the sappers is killed.
Turn 10 - German reinforcements arrive in the German rear, comprising four rifle sections. These will move into positions on the German right as this is clearly where the Soviet focus is. Additionally, the Germans get a rocket attack and the Soviets get an air attack.
Turn 9 - More German reinforcements arrive, this time a platoon of Tigers (3). The sides start to see some close combats and the IS 2’s suddenly become aware of the Tigers as they vie for positional advantage ….. leaving one Tiger smokin’.
Turn 8 - The infantry fight starts to hot up. The Tigers and IS 2’s do some manoeuvring, but despite shots fired and intensive fire resorted to, everything remains operable. The Tigers though, are out numbered and getting out manoeuvred.
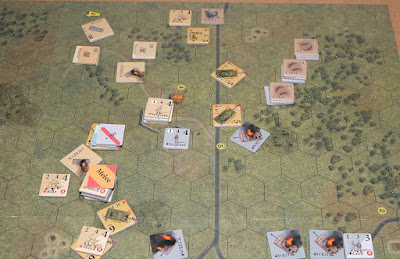
Turn 7 - The Soviets get an air strike and the last of their reinforcements arrive - a platoon of 4 SU-85’s with 4 shock infantry sections riding them. They will advance down the centre as the left is getting congested and the right has difficult terrain. All three Tigers are now burning! Pretty much all of the tanks were using intensive fire and breath was held with each roll - there are still 4 surviving IS 2, plus the 4 SU 85’s bringing up the third wave. The German infantry are about to face a lot of firepower.
 |
| The three Tigers are burning! |
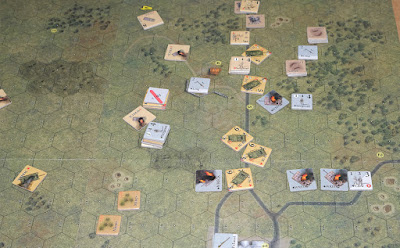
Turn 6 - On the Soviet left, the sappers start to get into position to attack the rail line. A satchel charge destroys one section (a rail hex), but heavy German small arms fire from the wood opposite prevents further attack. The SU 85’s with the shock units clinging to the armour are getting close to the German positions - I can’t see any way that the Germans are going to be able to hold on much longer.
Turn 5 - As the SU 85’s with their shock troops attempt to burst through the German centre, they loose a vehicle to the Marder II (which itself is then knocked out), but their accompanying shock troops are shredded by very effective small arms fire, with inter-locking fire. On the Soviet left, it is taking time to prepare for the assault on the rail line, with the Germans in the woods opposite resisting strongly. This is becoming a very tense game.
 |
| Soviet left waiting for more sappers to filter forwards, note the rubbled rail line hex at the top of the map. |
Turn 4 - Firefights everywhere!
Turn 3 - Hard fighting between the remnants of the two infantry forces. On the Soviet left, the sappers use a satchel charge to rubble one more rail hex. That is two down and one to go for an instant victory, but withering fire from the woods opposite is making the job difficult.
Turn 2 - The depleted sappers, now out of satchel charges, continue to try and get that third rail hex damaged, but fail. Incoming fire removes the last of the sappers and with that, the prospect of rail damage is now diminished, each Soviet unit makes to occupy various sections of track to achieve an end of game victory of at least five rail hexes being Soviet occupied. They can do this and there is nothing the Germans can do to interfere with that.
Turn 1 - There is nothing that can be done and I call the call game with a Soviet win.
 |
| End of play - the Soviets are in firm possession of the rail track. |
Conclusion
That was a strongly contested game with very heavy casualties amongst the infantry. The scenario really drew me into the play, particularly with the ‘in-hex’ intricacies that developed on the Soviet left as sappers tried to destroy rail track while under constant fire from the German infantry in the woods opposite.
There were four points of note in the game. The first was at the start when the IS 2’s came under fire from the 88 Flak gun. I was reluctant to dismount the tank riders, but with 13 turns in front of me, there was still plenty of time, even with the riders on foot. Freeing up the IS 2’s to fire, by dismounting the riders would have been a better choice. The Soviets were lucky that the Flak 88 had mostly poor dice!
Secondly, those three Tigers were very badly handled. I had them manoeuvring to avoid woods and they just ended up in the sights of more gun tubes. I should have allowed them to advance through the woods, even with the risk of bogging and then left them on the wood edge. That would have given them an extra +2 in their defence and they could have got an additional +1 if they had rolled for finding cover (finding the best spot within the hex — perhaps a dip in the ground etc), which would have brought their defensive value closer to parity with the soviet 122mm tank guns.
Had the Tigers taken out a few IS 2’s then the Soviets might have struggled to have enough units at the end of play to fulfil the need to have five or more units occupy the rail lines.
Thirdly, the loss of the shock troops (mounted on the SU-85’s) over just a couple of turns was a real … shock! This was mostly due to a German HMG (in trenches) that had not been previously neutralised. The HMG raked the tank riders and then a rifle section joined the HMG, so when the rest of the Soviet shock troops assaulted that position, they were finished off. Although not given much attention in the text, this small part of the map spent several turns as the focus of intense firefights / melees. Had the German HMG been dealt with earlier, the SU-85 / shock infantry force would have punched straight through the German defence and swamped them.
Finally, the sappers on the Soviet left, trying to destroy the rail track, almost became a sub game in itself, with a ton of nuance going on each turn. The cat and mouse between themselves and the German reinforcement in the woods beyond was very engaging. The Soviets had two IS 2’s that spent several turns guarding part of the map that proved to be irrelevant and their earlier deployment to support the left might have been enough to help the sappers out ….. who by the way, could still have won, if only the dice had been kinder with a couple of those powerful satchel charges.
Overall, the scenario was very enjoyable, giving an entertaining outing with OST. For those that have Volume I (east front) I would highly recommend getting Red Blitz …… before it sells out!
I did have to dip into my Stalingrad module for some units.
Coming soon ….. Red Blitz has a very interesting 4 scenario campaign game which I would like to get to the table soon.
Resource Section.
There are other posts on this blog that cover this series (see ‘Flying Pig’ and ‘Old School’ labels in the right margin), but one of interest that explains a bit of the system can be found here LINK
https://battlefieldswarriors.blogspot.com/2021/01/old-school-tactical-noville-belgium-44.html
An earlier post looks at the contents of Red Blitz and lists the scenarios LINK
https://battlefieldswarriors.blogspot.com/2023/02/red-blitz-new-ost-module.html
One of my Tiger v T-34 articles did cover this game, it can be a heavy read, but for those interested, here it is LINK
https://battlefieldswarriors.blogspot.com/2019/02/old-school-tactical-tiger-i-v-t-34.html
My sister webspace ‘COMMANDERS’ is being re-configured to showcase various figure and boardgame systems that I am enjoying and gives a flavour of where current projects are up to. Link.


A fine scenario there Norm and one that I could easily see transferring to the table top with BKC, or other similar rulesets. It certainly sounded a lot of fun and full of action, which is of course what we want in our games. Good post action thoughts too.
ReplyDeleteHi Steve, yes it would make a good BKC game I think. It was a very compelling play, always wanting just to see what the next turn might bring.
DeleteThat was a great read Norm and had me on the edge if my seat as the turns contend down....the Soviets WERE fortunate the 88 didn't cause more damage to their armour early on. The outcome and way it was reached seemed realistic for this stage of the war...the Red Army accepting fearful casualties to achieve the tactical aim of interdicting the Germans supply line, while outnumbered Germans put up a tenacious but ultimately doomed defence.
ReplyDeleteThanks Kieth, even when I thought it was all over, it was still giving opportunity. I’m pretty sure on another playing, the Soviets would not likely get away with so much from the 88 and the Tigers. Interestingly, the victory conditions were all about occupation - not casualties, so to some degree caution is abandoned for goal.
ReplyDeleteAgain, reminiscent of actual Red Army tactical doctrine!
DeleteAnother great post of one of my favourite games, thanks Norm.
ReplyDeleteRegards,
Paul.
Hi Paul, thanks, I hope to do something with the campaign game shortly.
ReplyDeleteGreat game, with a very well written batrep. I look forward to reading your report on the campaign in the near future!
ReplyDeleteThanks JB, the campaign looks a bit of a corker!
ReplyDeleteWow. IS-IIs and Tigers?!! Quite the heavy tank fest. Game sounded brutal on the soldiers; as the East front was. 😀
ReplyDeleteHi Stew, plenty in there to appeal to the tankers.
ReplyDeleteGreat sounding scenario, also sounded brutally realistic with the high casualty rates, the Soviets had a bit of luck early on but then the sappers could have won it for them anyway on another day!
ReplyDeleteBest Iain
Hi Iain, like all good scenarios, I think it could be re-run and give a different game.
ReplyDeleteA nifty scenario there Norm, I wonder if it could be bath tubbed down for a tabletop game🤔
ReplyDeleteHi Phil, I’m sure it could. Steve, above mention BKC, which would keep scenario integrity, but I think I would be more inclined to take slices of the boardgame and recreate, so 3 Tigers Vs 5 IS 2 or do the Sapper’s attack on the left as stand alone games.
ReplyDeleteI don't see why you could not translate this situation to the gaming table. The forces are not huge. Norm, do you plan to give this scenario a try with your WWII hex game? How would Tigers v IS-2s work out in the match-up? Neat vignette of railyard. That little diorama should have been your lead photo. Love the composition!
DeleteThanks Jonathan, yes, I think it would go to the table across a range of scales. It would work with the hex rules and in the distant past I did a Tiger v IS-2 in heavy woodland, from memory, there were a pair of IS-2’s and one had been immobilised and the other was protecting it, it was drawn from a historical situation.
DeleteExcellent! Enjoyed that...
ReplyDeleteHi Steve, I hope to get the 4 linked games mini campaign to the table soon.
ReplyDeleteVery late to the party here but thoroughly enjoyed the AAR and post combat analysis Norm. I really want Red Blitz and this just reinforced it, but holding out for the PnP version to pop up on Wargame Vault.
ReplyDeleteHi Timothy, thanks for dropping by. they got a lot right with this package. I am keen to get the 4 day linked battle to the table and that will certainly get attention here when it happens.
ReplyDeleteLooking forward to it Norm!
Delete